I am not new to 3D printing, but I am by far, not an expert. I have only been creating objects for the last couple of years. Up to this point, I have only been using filament made from polylactic acid, or more commonly know by its initials: PLA. It is probably the most common filament used by hobby-printers. It comes in a million different colors (ok, I haven't actually counted the colors), dozens of finishes - matte, gloss, metallic, satin sheen and many more. It is relatively easy to print, does not require an all metal hotend, use of a standard 0.4mm brass nozzle is the norm, does not require high temperatures and it's relatively inexpensive.
Printing with Nylon with embedded Kevlar is none of those things. Before we get to the filament, let's take a look at Kevlar and nylon and a bit of their histories and properties.
 Kevlar is a high-performance synthetic material that is known for its exceptional strength and durability. It was developed by Stephanie Kwolek at the DuPont company in 1965. It is a popular material with a wide range of applications, including body armor, tires, aerospace, fire fighting equipment and sporting equipment. It is a type of aramid fiber, which is a class of synthetic polymer materials that are characterized by their high strength and heat resistance. Aramid fibers are composed of long chains of molecules that are held together by strong chemical bonds, which give them their exceptional strength and durability. Kevlar, in particular, is known for its high tensile strength - five times greater than steel, and its high temperature resistance properties - having a melting point of 600° C.
The nylon used in Nylon + Kevlar filament is called PA6, or Nylon 6, and as a filament material for 3D printing, it is popular due to its ability to produce high-quality, precise prints with a smooth surface finish. One of the most significant properties of PA6 nylon filament is its high tensile strength, making it ideal for producing functional, light-load-bearing parts. Post-printing characteristics of PA6 nylon filament include its low water absorption and this property ensures that the printed parts maintain their dimensional stability even in humid environments, reducing the risk of warping or deformation. One of the primary issues with PA6 nylon filament (e.g. pre-printing) is its tendency to absorb moisture from the air. Moisture can degrade the filament's quality, leading to decreased strength and brittleness, which can affect the performance of printed parts. Additionally, PA6 nylon filament has a relatively low melting point compared to other high-performance materials such as ABS or polycarbonate, making it easier to print on a wider range of 3D printers.
Filament
The filament is dark grey in color with a rough texture. With nylon being hygroscopic, and particularly PA6 nylon, we need to deal with moisture in the filament. I am using an Ivation Countertop Dehydrator Drying Machine and set to highest temperature, 158° F or 70° C. I left the filament in the dehydrator for about sixteen hours.
Printing
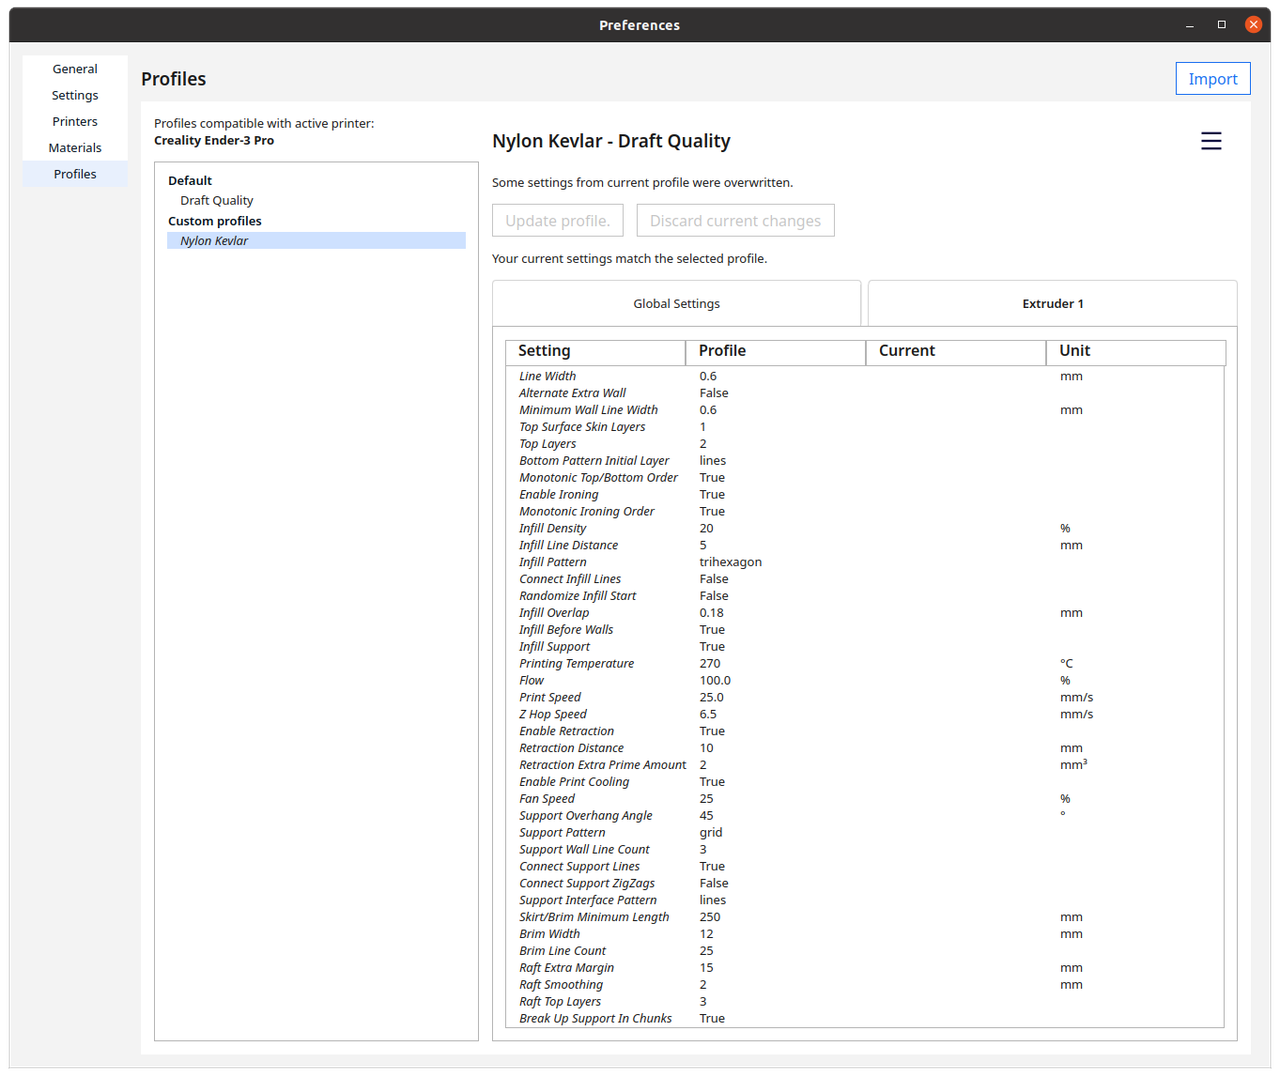
The print quality of objects made from Nylon + Kevlar filament is questionable at best. I use UltiMaker Cura for model slicing and, unfortunately, Cura does not have default settings for Nylon with a 0.6 mm nozzle. It took many iterations of adjusting parameters in Cura to arrive upon something that was close an ok quality print. Here is the configuration profile that I used. The configuration is a bit of a mess; the material is PLA and the nozzle size is 0.8 mm; in the available profiles, you should get a profile named "Nylon Kevlar"
I am using a 0.6 mm ruby tipped nozzle; if you use a vanilla brass nozzle, the kevlar fibers will quickly chew into the filament hole making it be no longer a perfectly round circle.
I had to modify the Marlin firmware on my heavily modified Ender 3 Pro to allow the hotend temperature to get up to at least 270° C and bed up to at least 80° C. I attempted printing at 255° C and the filament jammed in the hotend. I settled upon using 270° C for the hotend and 80° C for the bed.
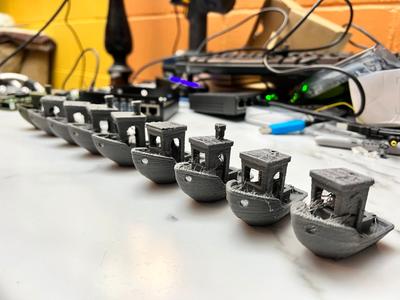
I printed eight Benchys (there are nine in the photo; one is a PLA print for comparison), each with different Cura settings. It was a trial and error of adjusting single variables and then printing a Benchy. The quality of a print, compared to a perfectly tuned Ender 3 Pro, that uses PLA is a stark difference. I was unable to get anything that remotely appeared to be a smooth surface. All surfaces have a rough, sandpaper-like feel. YouTuber 3DP Iceland made a brief video about Nylon + Kevlar, and his results were similar to mine: rough surfaces, and very stringy results.
The first round tests involved tuning temperatures. As I mentioned, 270° C was settled on for the hotend, and 80° C for the bed. There were fewer stringing at that temperature for the hotend. Second and third rounds involved adjusting retraction of filament on moves; this too reduced stringiness. The rest of the tunings were layer height, flow, extruder movement speed, and so on.

One of the other settings that I found was just about a must use: a raft instead of a brim or skirt. I used Magigoo for better adhesion. For longer (never successful) prints, using a raft proved to not work either. The edges of the raft curled up from the bed; using a wider, tighter brim might be more helpful.
Printing with this filament is very frustrating at times. Good bed adhesion is critical. A clean, wide enough nozzle is very important. Correctly calibrated nozzle height and leveled bed is important.
This is probably now one of my least favorite materials to print with;