 After reading an article that Adafruit put out on running CP/M on an emulator running on an Arduino, I thought I could expand up the article and add to the story. Enjoy.
In the early years of microcomputers, their processing power was incredibly limited compared to what we are accustomed to today. These devices, which emerged in the 1970s, were designed to be affordable and accessible for individual users, businesses, and small organizations, marking a stark departure from the large and expensive mainframes and minicomputers of the time. However, this accessibility came at a cost: the processing capabilities of these early microcomputers were constrained by the technology of the era, as well as by economic and practical considerations.
One of the initial limitations of early microcomputers was the processor itself. Early models, such as the Altair 8800 and Apple I, relied on 8-bit microprocessors like the Intel 8080 and MOS 6502. These 8-bit processors could typically handle only very simple calculations and operations in comparison to more advanced processors. Clock speeds were also significantly lower; they generally ranged from under 1 MHz to a few MHz. This lack of processing speed constrained the tasks that these computers could perform; complex calculations, large datasets, and intricate simulations were largely beyond their reach.
Memory was another significant limiting factor. Early microcomputers were equipped with a very small amount of RAM, often measured in kilobytes rather than the gigabytes or terabytes commonplace today. The limited RAM constrained the size and complexity of the programs that could be run, as well as the amount of data that could be processed at one time. It was not uncommon for users to constantly manage their memory use meticulously, choosing which programs and data could be loaded into their precious few kilobytes of RAM.
Storage capacity in early microcomputers was also quite constrained. Hard drives were expensive and uncommon in the earliest microcomputers, which often used cassette tapes or floppy disks for data storage. These mediums offered extremely limited storage capacity, often on the order of a few tens or hundreds of kilobytes. This required users to be extremely judicious with how they used and stored data and software, as the total available storage space was minuscule compared to today's standards.
In addition to hardware limitations, the software available for early microcomputers was often rudimentary due to the limited processing power. Graphical interfaces were virtually non-existent in the earliest microcomputers, with users typically interacting with the system through text-based command-line interfaces. Software applications were often basic and focused on simple tasks, such as word processing or basic spreadsheet calculations. Sophisticated applications like advanced graphics editing, video processing, or 3D modeling were well beyond the capabilities of these early systems.
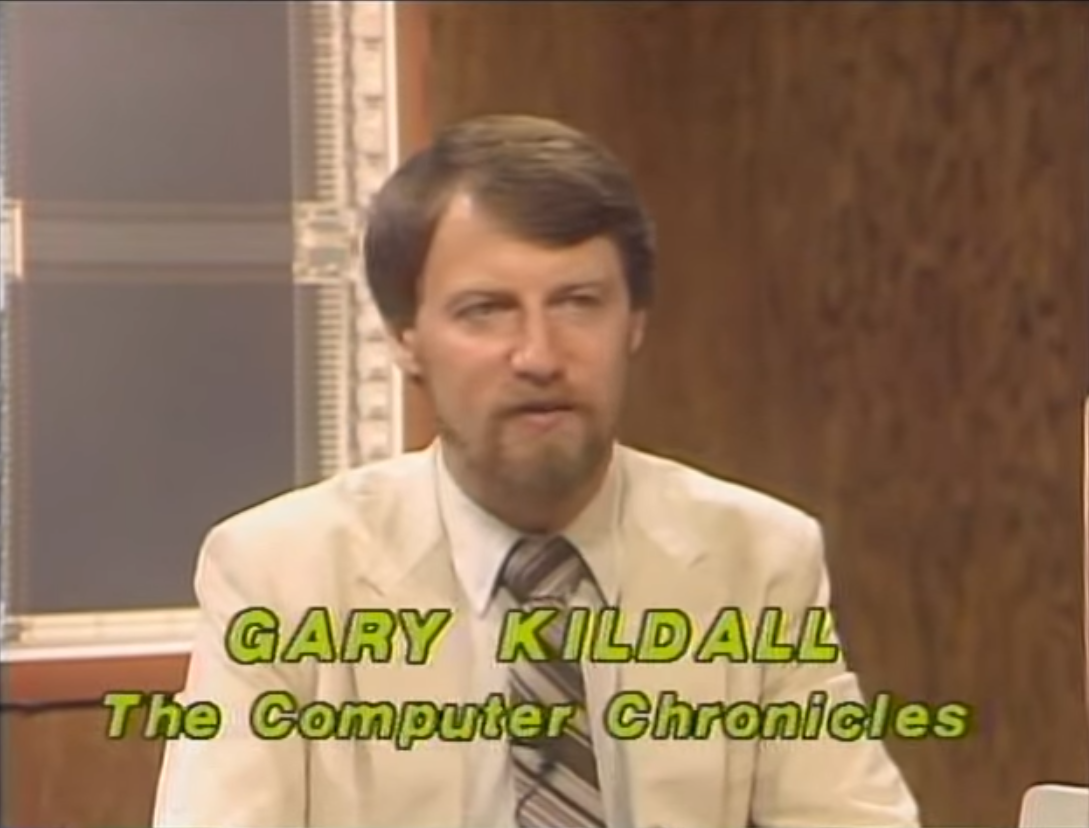
Against this burgeoning backdrop of the microcomputer revolution, a man by the name of Gary Kildall developed the Control Program for Microcomputers (CP/M) system. CP/M was a pre-MS-DOS operating system. Kildall, while working at Intel, developed a high-level language named PL/M (Programming Language for Microcomputers). He needed a way to test and debug programs written in PL/M on the newly developed Intel 8080 microprocessor. This led to the creation of CP/M. Recognizing the imminent proliferation of different hardware systems, Kildall, with his experience at Intel and knowledge of microprocessors, saw a need for a standardized software platform. Many microcomputers were operating on incompatible systems, and Kildall's solution was CP/M, an operating system designed to work across diverse hardware setups.
At the heart of CP/M's design was its modularity, characterized predominantly by the BIOS (Basic Input/Output System). The BIOS acted as an intermediary layer that handled the direct communication with the hardware, such as disk drives, keyboards, and displays. By isolating system-specific hardware instructions within the BIOS, CP/M maintained a core set of generic commands. This modular architecture meant that to make CP/M compatible with a new machine, only the BIOS needed to be tailored to the specific hardware, preserving the integrity of the rest of the operating system. This modularity enabled rapid porting of CP/M across a wide array of early microcomputers without rewriting the entire OS.
Another notable technical feature of CP/M was its file system. CP/M used a disk-oriented file system, which was one of the first to use a hierarchical directory structure. This structure allowed users to organize and manage files efficiently on floppy disks. The operating system employed a simple 8.3 filename convention (up to 8 characters for the filename and 3 for the extension) which, though limited by today's standards, was effective for the time. Files were accessed through File Control Blocks (FCBs), a data structure that provided a consistent interface for file operations, further simplifying application development.
CP/M's command-line interface (CLI) was a hallmark feature, providing users with a means to interact with the system and run applications. The CLI, while rudimentary by today's standards, allowed users to navigate the directory structure, execute programs, and manage files. Coupled with a set of basic utilities bundled with the OS, this interface provided an accessible environment for both end-users and developers. For developers, CP/M provided a BDOS (Basic Disk Operating System) interface, allowing applications to be written without deep knowledge of the underlying hardware, thus fostering a rich ecosystem of software tailored for the CP/M platform.
However, CP/M's technical success didn't guarantee lasting market dominance. As it gained traction, Kildall's company, Digital Research, became a major player in the microcomputer software industry. But a missed business opportunity with IBM led to IBM choosing Microsoft's MS-DOS, which bore similarities to CP/M, for its Personal Computer. The story of early personal computing is interesting, and is depicted nicely in Pirates of Silicon Valley (available on DVD). The IBM + MS-DOS choice tilted the scales in the software market, positioning MS-DOS and its successors as major players, while CP/M gradually faded. Nonetheless, CP/M's role in early personal computing is significant, representing a key step towards standardized operating systems.
I wasn't around for the early days of personal computing when CP/M was a big deal. By the time I started exploring computers in the mid-1980s, the Apple IIe was the choice in education where I was first really exposed to personal computers. The Apple IIe was straightforward and easy to use. When I turned it on, I was met with the AppleSoft BASIC interface. In 1992, as I would soon be a teenager, my family purchased its first personal computer from Gateway 2000. Even though I missed the CP/M phase, the Apple IIe provided a solid introduction to the world of computing for me with the Gateway 2000 being foundational in my ever growing interest in computers.
Let's get back to CP/M.
The primary architecture CP/M was designed for was the Intel 8080 and its compatible successor, the Zilog Z80. However, CP/M was adapted to run on several different architectures over time. Here's a brief overview of some architectures and their technical specs:
-
- 8-bit microprocessor
- Clock speeds typically up to 2 MHz
- 4.5k transistors
- 16-bit address bus, enabling it to access 65,536 memory locations
-
- 8-bit microprocessor
- Clock speeds of 2.5 MHz to 10 MHz
- Around 8.5k transistors
- 16-bit address bus, 8-bit data bus
- It had enhanced instruction set compared to 8080 and was binary compatible with it.
-
- 8-bit microprocessor
- Clock speeds of up to 5 MHz
- An improved and more power-efficient version of the 8080
- Included new instructions over the 8080
-
Zilog Z8000 and Intel 8086/8088:
- These were 16-bit processors.
- CP/M-86 was developed for these processors as an extension to the original 8-bit CP/M.
- The 8086 had a 16-bit data bus, and the 8088, used in the original IBM PC, had an 8-bit data bus.
-
- While not a primary platform for CP/M, there were ports and adaptations made for the 16/32-bit Motorola 68000 series.
- Used in early Apple Macintosh computers, Atari ST, Commodore Amiga, and others.
-
- This is a lesser-known 32-bit minicomputer for which CP/M was adapted.
We have already looked at the Z80 (in the context of the TI-84+ graphing calculator) as well as the Motorola 68000 (in the context of the TI-89 graphing calculator). Instead of focusing on a specific architecture, the RC2014, to run CP/M on bare metal, we will be looking at running a CP/M emulator on Adafruit's Grand Central M4 Express. I would love to get of the RC2014 kits and run CP/M on bare metal, but for now, we won't be doing that.
We're concentrating on setting up RunCPM on the Grand Central, so we'll only touch on the Z80 briefly. For additional information on the Z80, visit z80.info. The person behind z80.info also write an in-depth look at Z80 hardware and assembly language in Hackspace Magazine issues 7 & 8. If you're interested in a comprehensive study of the Z80, consider the books: Build your own Z80 computer - design guidelines and application notes by Steve Ciarcia (you can also grab the PDF here or here) and Programming the Z80 by Rodnay Zaks (you can also grab PDFs here, or here or here or here). Both books have out of print for decades and are rather expensive on Amazon.
CP/M
CP/M incorporated wildcard characters in its file naming conventions, a legacy we continue to see in modern systems. Specifically, '?' was used to match any single character, and '*' could match part of or an entire file name or file type.
In terms of commands, many accepted these wildcards, and such a command was labeled as using an ambiguous file reference, abbreviated as "afn". In contrast, commands that required file references to be specific, without the use of wildcards, were termed as using an unambiguous file reference or "ufn". These shorthand terms, "afn" and "ufn", are frequently found in official CP/M documentation and will be adopted for our discussion here.
Builtin Commands:
-
DIR afn (or simply DIR): Employed to display the names of files that match the specified wildcard pattern.
-
ERA afn: This command is used to delete one or multiple files.
-
REN ufn1=ufn2: As the name suggests, this command allows users to rename a specific file.
-
TYPE ufn: Useful for viewing the contents of an ASCII file..
Standard Programs:
CP/M was equipped with a suite of standard programs, often referred to as Transient Commands. These weren't embedded within the core of CP/M but were accessible to the user as needed. They'd be loaded, run, and then purged from the memory. Several of these commands were fundamental for operations within the CP/M environment. A concise overview of some notable Transient Commands is provided below, though a more exhaustive exploration can be found in the CP/M manual.
-
STAT: This program offers insights into the current disk's status, specifics about individual files, and device assignment details.
-
ASM: A tool for program assembly. It takes a source code input and assembles it to produce an executable.
-
LOAD: Designed for Intel HEX formatted code files, this command loads the code and subsequently converts it into an executable format.
-
DDT: This is CP/M's built-in debugger, essential for diagnosing and resolving program errors.
-
ED: CP/M's text editor, enabling users to create and modify text files within the operating system.
-
SUBMIT: A utility to accept a file containing a list of commands, essentially enabling batch processing.
-
DUMP: A handy tool for those looking to view a file's contents represented in hexadecimal format.
For those eager to dive deeper into the vast ocean of CP/M's capabilities and legacy, the Tim Olmstead Memorial Digital Research CP/M Library is an invaluable resource, housing a trove of information and code associated with CP/M.
RunCPM is essentially a Z80 emulator that comes packaged with different CP/M versions tailored to function on the emulated Z80. It's a comprehensive toolkit for those interested in delving into Z80 assembly language programming, with the added perk of accessing the Grand Central's IO capabilities. As a bonus, Microsoft Basic is incorporated within the package, and for enthusiasts looking to explore further, various other languages can be sourced online. One such language is Modula-2, which holds significance as Niklaus Wirth's successor to the famed Pascal language).
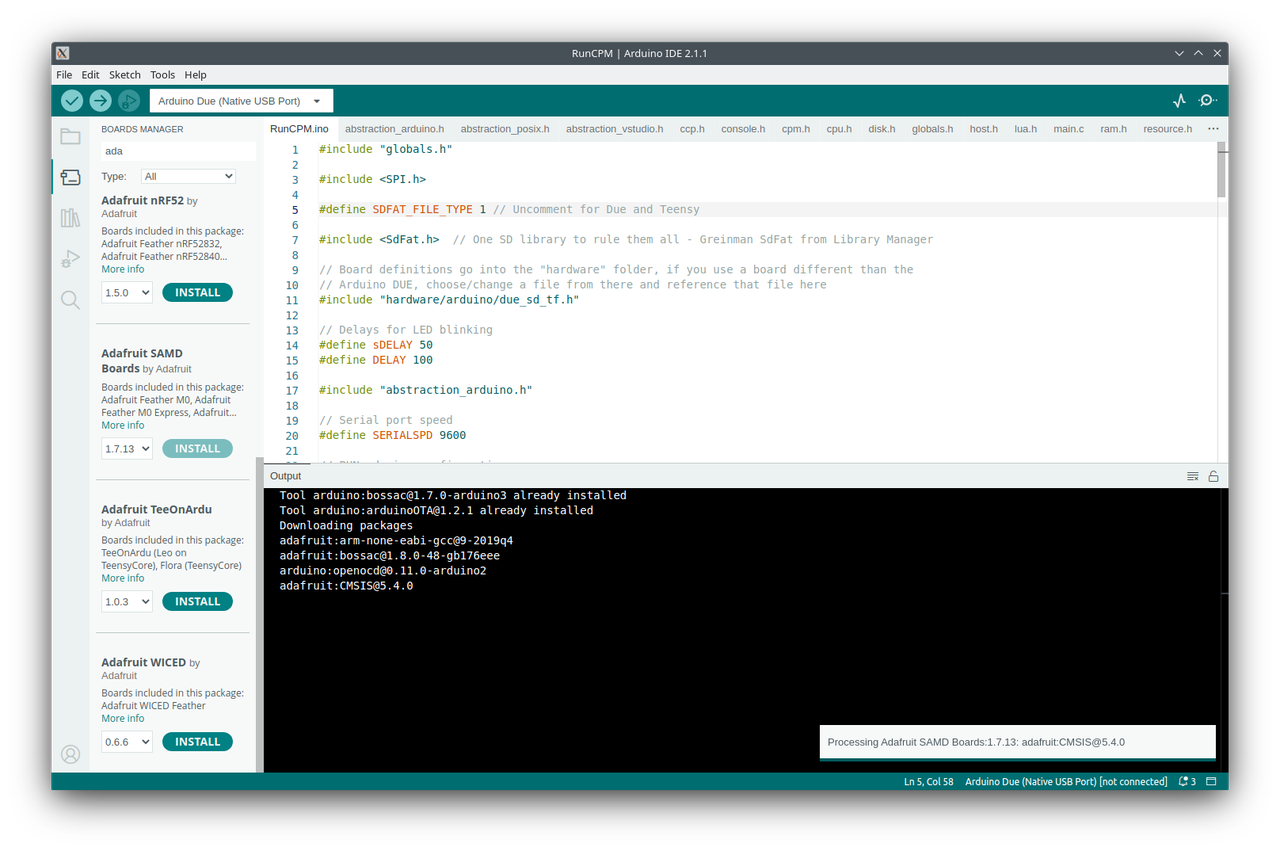
When it comes to building RunCPM, the approach isn't one-size-fits-all. The build method you opt for is contingent on the target platform. In our case, we're aiming for compatibility with the Grand Central, so the Arduino method is the route we'll take. Begin by launching the RunCPM.ino file within the Arduino IDE (or Visual Code). However, prior to this step, ensure that the IDE is configured to build for the Grand Central. The following are stripped down instructions for RunCPM from its Github repo.
RunCPM - Z80 CP/M emulator
RunCPM is an application which can execute vintage CP/M 8 bits programs on many modern platforms, like Windows, Mac OS X, Linux, FreeBSD, Arduino DUE and variants, like Adafruit Grand Central Station, and the Teensy or ESP32. It can be built both on 32 and 64 bits host environments and should be easily portable to other platforms.
RunCPM is fully written in C and in a modular way, so porting to other platforms should be only a matter of writing an abstraction layer file for it. No modification to the main code modules should be necessary.
If you miss using powerful programs like Wordstar, dBaseII, mBasic and others, then RunCPM is for you. It is very stable and fun to use.
RunCPM emulates CP/M from Digital Research as close as possible, the only difference being that it uses regular folders on the host instead of disk images.
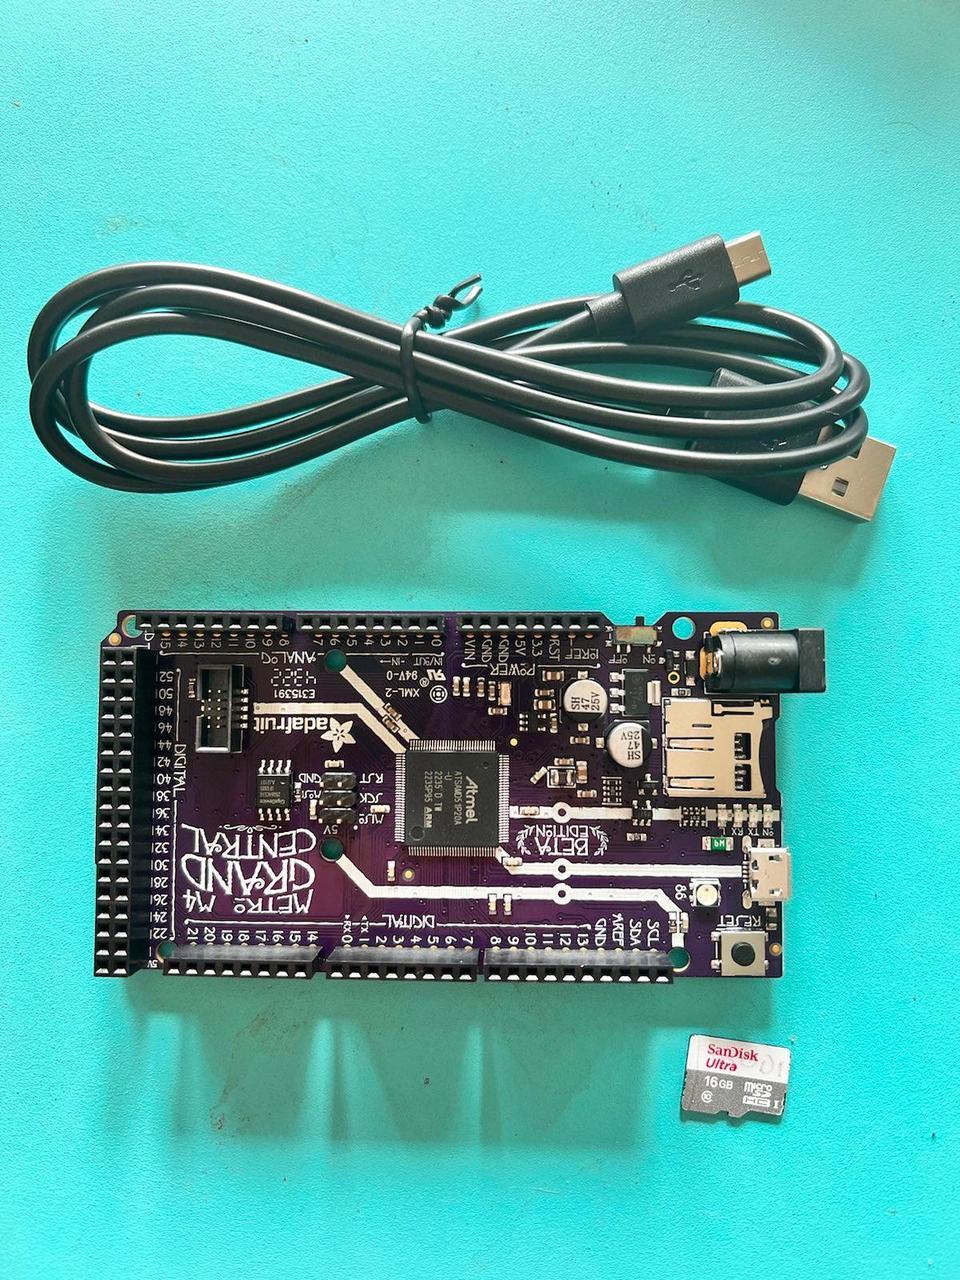
Grand Central M4 (GSM4)
- The ATSAMD51 is large with an Arduino Mega shape and pinout.
- The front half has the same shape and pinout as Adafruit's Metro's, so it is compatible with all Adafruit shields.
- It's got analog pins, and SPI/UART/I2C hardware support in the same spot as the Metro 328 and M0.
- It's powered with an ATSAMD51P20, which includes:
- Cortex M4 core running at 120 MHz
- Floating point support with Cortex M4 DSP instructions
- 1MB flash, 256 KB RAM
- 32-bit, 3.3V logic and power
- 70 GPIO pins in total
- Dual 1 MSPS DAC (A0 and A1)
- Dual 1 MSPS ADC (15 analog pins)
- 8 x hardware SERCOM (can be I2C, SPI or UART)
- 22 x PWM outputs
- Stereo I2S input/output with MCK pin
- 12-bit Parallel capture controller (for camera/video in)
- Built-in crypto engines with AES (256 bit), true RNG, Pubkey controller
- Power the Grand Central with 6-12V polarity protected DC or the micro USB connector to any 5V USB source.
- The 2.1mm DC jack has an on/off switch next to it so you can turn off your setup easily.
- The board will automagically switch between USB and DC.
- Grand Central has 62 GPIO pins, 16 of which are analog in, and two of which are true analog out.
- There's a hardware SPI port, hardware I2C port, and hardware UART.
- 5 more SERCOMs are available for extra I2C/SPI/UARTs.
- Logic level is 3.3V.
The GC M4 comes with native USB support, eliminating the need for a separate hardware USB to Serial converter. When configured to emulate a serial device, this USB interface enables any computer to send and receive data to the GC M4. Moreover, this interface can be used to launch and update code via the bootloader. The board’s USB support extends to functioning as a Human Interface Device (HID), allowing it to act like a keyboard or mouse, which can be a significant feature for various interactive projects.
On the hardware front, the GC M4 features four indicator LEDs and one NeoPixel located on the front edge of the PCB, designed for easy debugging and status indication. The set includes one green power LED, two RX/TX LEDs that indicate data transmission over USB, and a red LED connected to a user-controllable pin. Adjacent to the reset button, there is an RGB NeoPixel. This NeoPixel can be programmed to serve any purpose, such as displaying a status color code, which adds a visually informative aspect to your projects.
Furthermore, the GC M4 includes an 8 MB QSPI (Quad SPI) Flash storage chip on board. This storage can be likened to a miniature hard drive embedded within the microcontroller. In a CircuitPython environment, this 8 MB flash memory serves as the storage space for all your scripts, libraries, and files, effectively acting as the "disk" where your Python code lives. When the GC M4 is used in an Arduino context, this storage allows for read/write operations, much like a small data logger or an SD card. A dedicated helper program is provided to facilitate accessing these files over USB, making it easy to transfer data between the GC M4 and a computer. This built-in storage is a significant feature, as it simplifies the process of logging data and managing code, and it opens up new possibilities for more advanced and storage-intensive projects.
The GC M4 board boasts a built-in Micro SD Card slot, providing a convenient and flexible option for removable storage of any size. This storage is connected to an SPI (Serial Peripheral Interface) SERCOM, providing high-speed data communication. Notably, SDIO (Secure Digital Input Output), a faster interface that is commonly used for SD cards, is not supported on this board. Nevertheless, the availability of a dedicated Micro SD Card slot is a standout feature, as it allows users to easily expand the storage capacity of their projects without any complex setup. This integrated Micro SD Card slot is a substantial advantage when comparing the GC M4 to other boards, such as the Arduino Due. Unlike the GC M4, the Arduino Due does not come with built-in SD card support. For projects that require additional storage or data logging capabilities on the Due, users must purchase and connect an external Micro SD adapter or a shield, which can add to the overall cost and complexity of the setup. The built-in SD Card slot on the GC M4 eliminates the need for such additional components, simplifying project designs and reducing both the cost and the physical footprint of the final build.
This convenient feature underscores the GC M4's design philosophy of providing an integrated, user-friendly experience. By including an SD Card slot directly on the board, the GC M4 encourages broader experimentation with data-intensive applications, such as data logging, file storage, and multimedia processing, which can be essential for a wide range of creative and practical projects.
Comes pre-loaded with the UF2 bootloader, which looks like a USB storage key. Simply drag firmware on to program, no special tools or drivers needed! It can be used to load up CircuitPython or Arduino IDE (it is bossa v1.8 compatible)
With all of these features, it probably seems like cheating for getting CP/M working. And we will be barely exercising these features. If only Gary Kildall could see how computers and technology have evolved.
Grand Central Specific Adaptations for RunCMP
Arduino digital and analog read/write support was added by Krzysztof Kliś via extra non-standard BDOS calls (see the bottom of cpm.h file for details).
LED blink codes: GSM4 user LED will blink fast when RunCPM is waiting for a serial connection and will send two repeating short blinks when RunCPM has exited (CPU halted). Other than that the user LED will indicate disk activity.
RunCPM needs A LOT of RAM and Flash memory by Arduino standards, so you will need to run on Arduinos like the DUE (not the Duemilanove) and similar controllers, like Adafruit's Grand Central. It is theoretically possible to run it on an Arduino which has enough Flash (at least 96K) by adding external RAM to it via some shield, but this is untested, probably slow and would require an entirely different port of RunCPM code. That could be for another day, but if you want to get CP/M running quickly, grab a Grand Central or Due.
You will also need a micro sd ("tf") card.
When using Arduino boards, the serial speed as well as other parameters, may be set by editing the RunCPM.ino sketch. The default serial speed is 9600 for compatibility with vintage terminals.
You will need to clone the RunCPM repository:
git clone https://github.com/MockbaTheBorg/RunCPM.git -v
In RunCPM.ino, you will want to specify the Grand Center header file be included:
#include "hardware/arduino/gc.h"
instead of
#include "hardware/arduino/due_sd_tf.h"
Getting Started
Preparing the RunCPM folder :
To set up the RunCPM environment, create a folder that contains both the RunCPM executable and the CCP (Console Command Processor) binaries for the system. Two types of CCP binaries are provided: one for 64K memory and another for 60K memory. On your micro SD card, you will want to create a directory called A which will need a directory called 0 in it. Place in 0 the contents of A.zip.
The 64K version of the CCPs maximizes the amount of memory available to CP/M applications. However, its memory addressing ranges are not reflective of what a real CP/M computer would have, making it less authentic in terms of emulating a physical CP/M machine.
On the other hand, the 60K version of the CCPs aims to provide a more realistic memory addressing space. It maintains the CCP entry point at the same loading address that it would occupy on a physical CP/M computer, adding to the authenticity of the emulation.
While the 64K and 60K versions are standard, it is possible to use other memory sizes, but this would necessitate rebuilding the CCP binaries. The source code needed to do this is available on disk A.ZIP. The CCP binaries are named to correspond with the amount of memory they are designed to operate with. For example, DRI's CCP designed for a 60K memory environment would be named CCP-DR.60K. RunCPM searches for the appropriate file based on the amount of memory selected when it is built.
It is important to note that starting with version 3.4 of RunCPM, regardless of the amount of memory allocated to the CP/M system, RunCPM will allocate 64K of RAM on the host machine. This ensures that the BIOS always starts at the same position in memory. This design decision facilitates the porting of an even wider range of CCP codes to RunCPM. Starting from version 3.4, it is essential to use new copies of the master disk A.ZIP, as well as the ZCPR2 CCP and ZCPR3 CCP (all of which are provided in the distribution).
Building dependencies
All boards now use the SdFat 2.x library, from here: https://github.com/greiman/SdFat/ All Arduino libraries can be found here: https://www.arduinolibraries.info/
SdFat library change
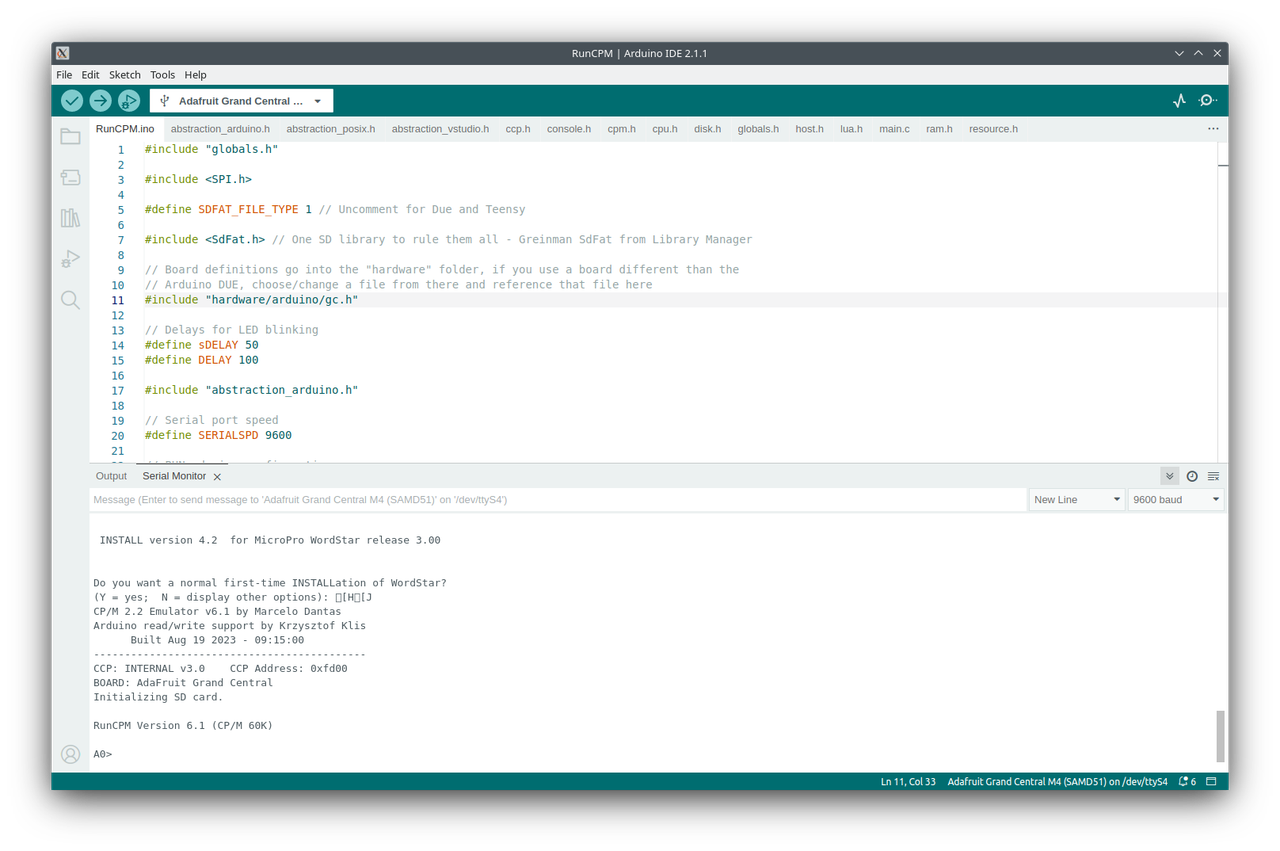
If you get a 'File' has no member named 'dirEntry' error, then a modification is needed on the SdFat Library SdFatConfig.h file (line 78 as of version 2.0.2) changing:
#define SDFAT_FILE_TYPE 3
to
#define SDFAT_FILE_TYPE 1
As file type 1 is required for most of the RunCPM ports.
To find your libraries folder, open the Preferences in Arduino IDE and look at the Sketchbook location field.
Changes to Adapt to the Grand Central
Given that the official repository has already integrated the modifications to support the Grand Central, the following changes are primarily to serve educational purposes or as guidance for those intending to adapt the setup for other M4 boards.
All of the following should already be set in RunCPM.ino, but I'll write them out so you can see what changes have been made.
abstraction_arduino.h For the Grand Central, the alteration pertains to the setting of HostOs:
On line 8, the line:
#ifdef ARDUINO_SAM_DUE
Should be transformed to:
#if defined ARDUINO_SAM_DUE || defined ADAFRUIT_GRAND_CENTRAL_M4
RunCPM.ino
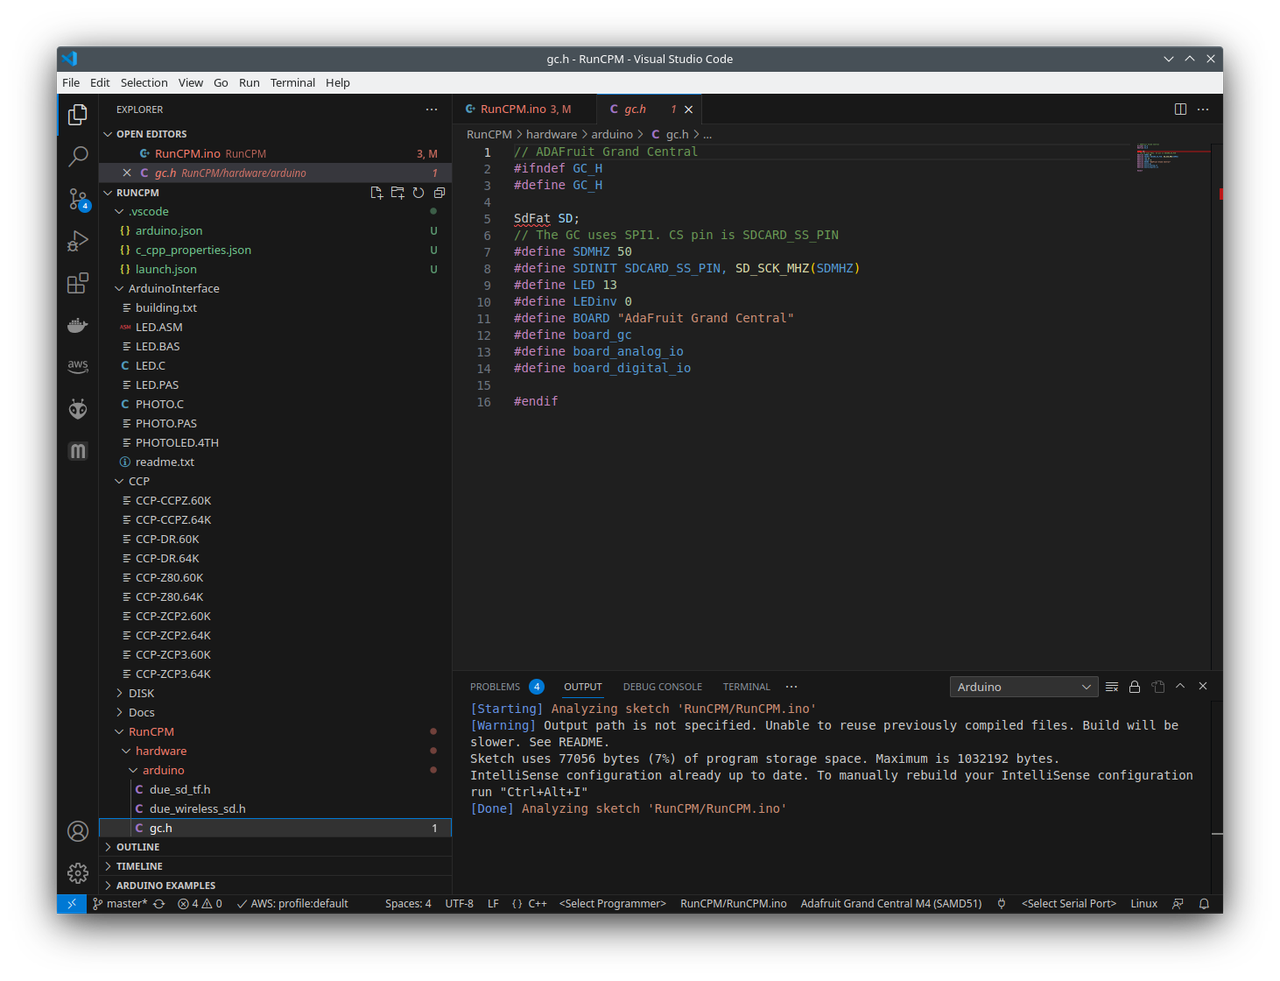
Aligning with the alteration in abstraction_arduino.h, we also need to integrate Grand Central support in this file. Specifically, configurations relating to the SD card, LED interfaces, and the board's designation need adjustment. Insert a branch to the board configuration #if structure at approximately line 28:
#elif defined ADAFRUIT_GRAND_CENTRAL_M4
  #define USE_SDIO 0
  SdFat SD;
  #define SDINIT SDCARD_SS_PIN
  #define LED 13
  #define LEDinv 0
  #define BOARD "ADAFRUIT GRAND CENTRAL M4"
Due to certain ambiguous factors (perhaps the unique SPI bus configuration for the SD card), initializing the SD card and file system requires a different approach. Thus, following the insertion of the previous snippet, at line 108:
#if defined ADAFRUIT_GRAND_CENTRAL_M4
  if (SD.cardBegin(SDINIT, SD_SCK_MHZ(50))) {
    if (!SD.fsBegin()) {
      _puts("\nFile System initialization failed.\n");
      return;
    }
  }
#else
  if (SD.begin(SDINIT)) {
#endif
This snippet replaces the original:
if (SD.begin(SDINIT)) {
Following these modifications, it's straightforward to get RunCPM functional. For communication, the USB connection acts as the terminal interface. However, take note that not all terminal emulators provide flawless compatibility. Since CP/M anticipates a VT100-style terminal, some features might not behave as expected.
Installing Adafruit SAMD M4 Boards
If you haven't already, you will need to add Adafruit board definitions to Arduino IDE. To do this, copy the URL below and paste into the text field in the dialog box; navigate to File --> Preferences
https://adafruit.github.io/arduino-board-index/package_adafruit_index.json
We will only need to add one URL to the IDE in this example, but you can add multiple URLS by separating them with commas. Copy and paste the link below into the Additional Boards Manager URLs option in the Arduino IDE preferences.

Preparing the CP/M virtual drives :
VERY IMPORTANT NOTE - Starting with RunCPM version 3.7, the use of user areas has become mandatory. The support for disk folders without user areas was dropped between versions 3.5 and 3.6. If you are running a version up to 3.5, it is advisable to consider upgrading to version 3.7 or higher. However, before making this move, it is important to update your disk folder structure to accommodate the newly required support for user areas.
RunCPM emulates the disk drives and user areas of the CP/M operating system by means of subfolders located under the RunCPM executable’s directory. To prepare a folder or SD card for running RunCPM, follow these procedures:
Create subfolders in the location where the RunCPM executable is located. Name these subfolders "A", "B", "C", and so forth, corresponding to each disk drive you intend to use. Each one of these folders represents a separate disk drive in the emulated CP/M environment. Within the "A" folder, create a subfolder named "0". This represents user area 0 of disk A:. Extract the contents of the A.ZIP package into this "0" subfolder. When you switch to another user area within CP/M, RunCPM will automatically create the respective subfolders, named "1", "2", "3", etc., as they are selected. For user areas 10 through 15, subfolders are created with names "A" through "F".
It is crucial to keep all folder and file names in uppercase to avoid potential issues with case-sensitive filesystems. CP/M originally supported only 16 disk drives, labeled A: through P:. Therefore, creating folder names representing drives beyond P: will not function in the emulation, and the same limitation applies to user areas beyond 15 (F).
Available CCPs :
RunCPM can run on its internal CCP or using binary CCPs from real CP/M computers. A few CCPs are provided:
- CCP-DR - Is the original CCP from Digital Research.
- CCP-CCPZ - Is the Z80 CCP from RLC and others.
- CCP-ZCP2 - Is the original ZCPR2 CCP modification.
- CCP-ZCP3 - Is the original ZCPR3 CCP modification.
- CCP-Z80 - Is the Z80CCP CCP modification, also from RLC and others.
The A.ZIP package includes the source code for the Console Command Processors (CCPs), allowing for native rebuilding if necessary. To facilitate this, SUBMIT (.SUB) files are provided, which are also useful for rebuilding some of the RunCPM utilities.
While the package comes with a set of CCPs, users can adapt additional CCPs to work with RunCPM. If successful in this adaptation, users are encouraged to share their work so it can be potentially added to the package for others to use. By default, RunCPM utilizes an internal CCP. However, if you prefer to use a different CCP, two specific steps must be taken, which are outlined below:
1 - Change the selected CCP in globals.h (in the RunCPM folder). Find the lines that show:
/ Definition of which CCP to use (must define only one) /
#define CCP_INTERNAL // If this is defined, an internal CCP will emulated
//#define CCP_DR
//#define CCP_CCPZ
//#define CCP_ZCPR2
//#define CCP_ZCPR3
//#define CCP_Z80
Comment out the CCP_INTERNAL line by inserting two slashes at the line's beginning. Then remove the two slashes at the start of the line containing the name of the CCP you intend to use. Save the file.
2 - Copy a matching CCP from the CCP folder to the folder that holds your A folder. Each CCP selection will have two external CCP's, one for 60K and another for 64K. If you have already built the executable, you will need to do it again.
Anytime you wish to change the CCP, you must repeat these steps and rebuild.
IMPORTANT NOTE - CCP-Z80 expects the $$$.SUB to be created on the currently logged drive/user, so when using it, use SUBMITD.COM instead of SUBMIT.COM when starting SUBMIT jobs.
Contents of the "master" disk (A.ZIP) :
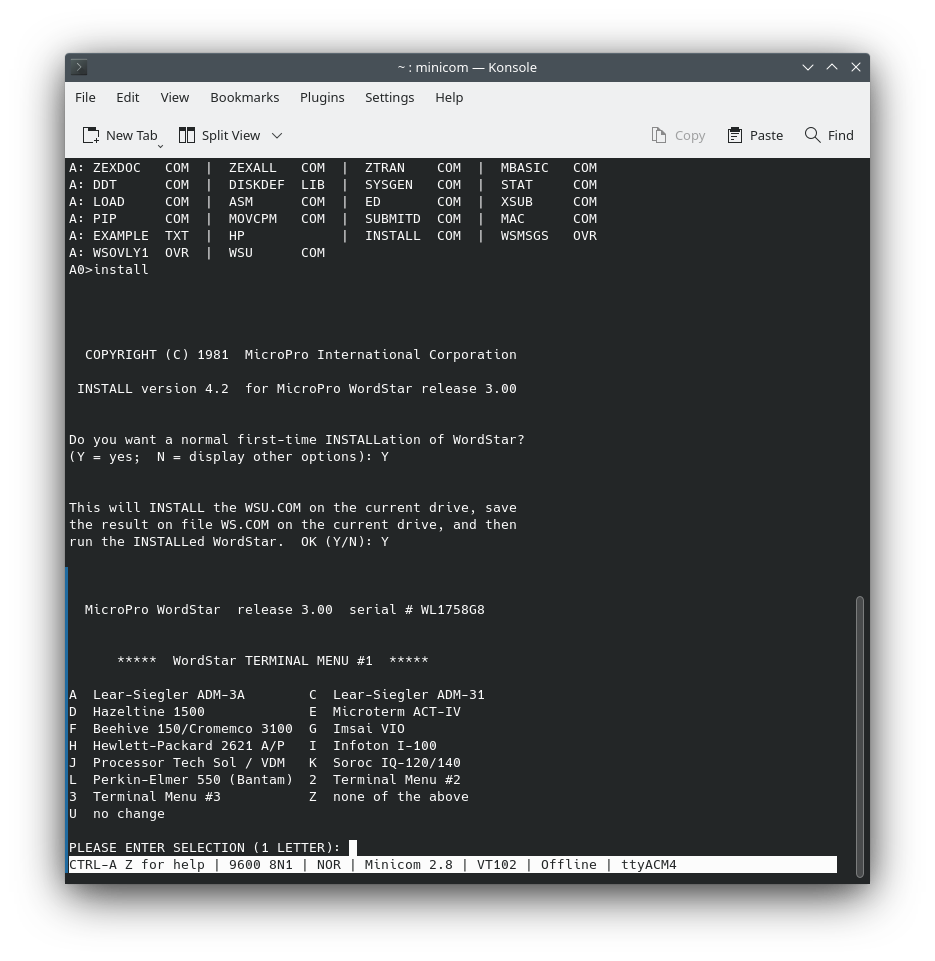
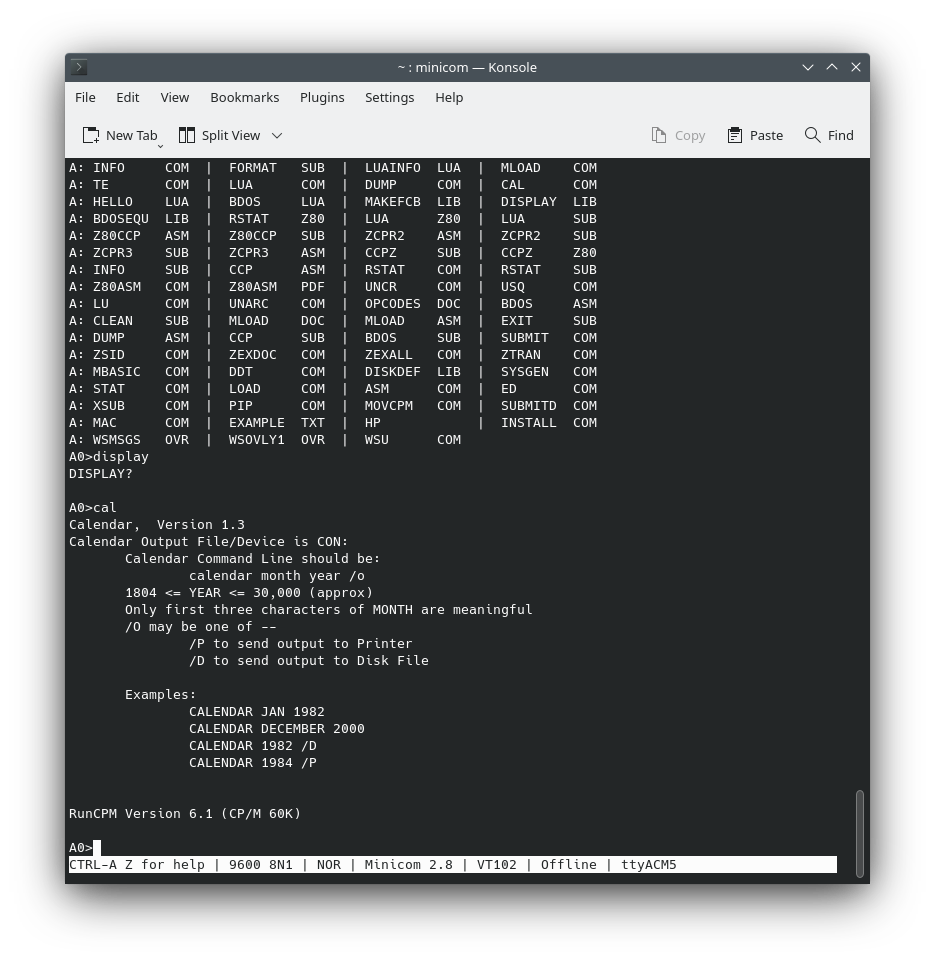
The "master" disk, labeled as A.ZIP, serves as the foundational environment for CP/M within RunCPM. It includes the source code for the Console Command Processors (CCPs) and features the EXIT program, which terminates RunCPM when executed.
The master disk also houses the FORMAT program, designed to create a new drive folder, simulating the process of formatting a disk. Importantly, the FORMAT program doesn't affect existing drive folders, ensuring its safe use. Despite its ability to create these drive folders, it doesn't have the capability to remove them from within RunCPM. To remove a drive folder created by the FORMAT program, manual deletion is necessary, which involves accessing the RunCPM folder or SD Card via a host machine.
In addition to these utilities, the master disk contains Z80ASM, a potent Z80 assembler that directly produces .COM files, ready for execution. To further enhance the RunCPM experience, the master disk also includes various CP/M applications not originally part of Digital Research Inc.'s (DRI's) official distribution. A detailed list of these additional applications can be found in the 1STREAD.ME file included on the master disk.
Printing
Printing to the PUN: and LST: devices is allowed and will generate files called "PUN.TXT" and "LST.TXT" under user area 0 of disk A:. These files can then be tranferred over to a host computer via XMODEM for real physical printing. These files are created when the first printing occurs, and will be kept open throughout RunCPM usage. They can be erased inside CP/M to trigger the start of a new printing. As of now RunCPM does not support printing to physical devices.
Limitations / Misbehaviors
The objective of RunCPM is not to emulate a Z80 CP/M computer perfectly, but to allow CP/M to be emulated as close as possible while keeping its files on the native (host) filesystem.
This will obviously prevent the accurate physical emulation of disk drives, so applications like MOVCPM and STAT will not be useful.
The master disk, A.ZIP, continues to provide the necessary components to maintain compatibility with Digital Research Inc.'s official CP/M distribution. Currently, only CP/M 2.2 is fully supported, though work is ongoing to bring support for CP/M 3.0.
IN/OUT instructions are designated to facilitate communication between the soft CPU BIOS and BDOS and the equivalent functions within RunCPM, thus these instructions are reserved for this purpose and cannot be used for other tasks. The video monitor in this emulation environment is assumed to be an ANSI/VT100 emulation, which is the standard for DOS/Windows/Linux distributions. This means CP/M applications hard-coded for different terminals may encounter issues with screen rendering.
When using a serial terminal emulator with RunCPM, it is important to configure the emulator to send either a Carriage Return (CR) or a Line Feed (LF) when the Enter key is pressed, but not both (CR+LF). Sending both can disrupt the DIR listing on Digital Research’s Command Control Processor (CCP), consistent with standard CP/M 2.2 behavior.
RunCPM does not support setting files to read-only or applying other CP/M-specific file attributes. All files within the RunCPM environment will be both visible and read/write at all times, necessitating careful file handling. RunCPM does support setting "disks" to read-only, but this read-only status applies only within the context of RunCPM. It does not alter the read/write attributes of the disk’s containing folder on the host system.
Furthermore, some applications, such as Hi-Tech C, may attempt to access user areas numbered higher than 15 to check for a specific CP/M flavor other than 2.2. This action results in the creation of user areas labeled with letters beyond 'F', which is expected behavior and will not be altered in RunCPM.
CP/M Software
CP/M software library here! or here
Having inserted the microSD card and connected the Grand Central appropriately, ensuring both board and port settings are accurate, proceed to build and install onto the Grand Central.
RunCPM provides access to Arduino I/O capabilities through CP/M's BDOS (Basic Disk Operating System) interface. By loading the C register with a function number and a call to address 5, additional functionality that has been added to the system can be accessed.
For these functions, the number of the pin being used is placed in the D register and the value to write (when appropriate) is placed in E. For read functions, the result is returned as noted.
PinMode

LD C, 220
LD D, pin_number
LD E, mode ;(0 = INPUT, 1 = OUTPUT, 2 = INPUT_PULLUP)
CALL 5

DigitalRead

LD C, 221
LD D, pin_number
CALL 5 Returns result in A (0 = LOW, 1 = HIGH).

DigitalWrite

LD C, 222
LD D, pin_number
LD E, value ;(0 = LOW, 1 = HIGH)
CALL 5

AnalogRead

LD C, 223
LD D, pin_number
CALL 5

Returns result in HL (0 - 1023).

AnalogWrite (i.e. PWM)

LD C, 224
LD D, pin_number
LD E, value (0-255)
CALL 5
Turning on a LED
Using the provided PinMode and DigitalWrite calls, writing code to control an LED, such as turning it on when connected to pin D8, becomes a straightforward task. To accomplish this, one can use the ED editor to create a file named LED.ASM with the necessary code. This file editing can be done directly on your workstation and saved to the SD card, which is a convenient approach given that ED, the editor, hails from a different era of computing and might feel a bit foreign to modern users accustomed to contemporary text editors.
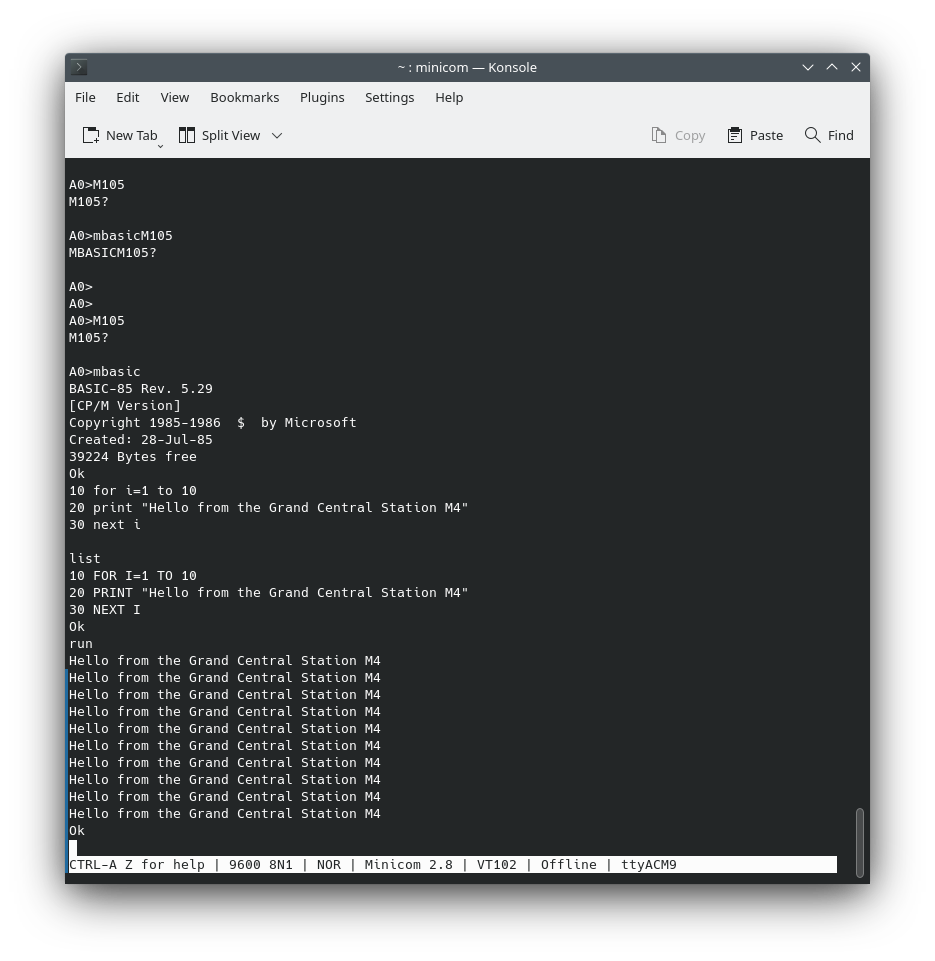
; Turn on a LED wired to pin 8
org 100h    ;start address
mvi c, 220  ;pinmode
mvi d, 8    ;digital pin number
mvi e, 1    ;value (0 = low, 1 = high)
push d      ;save arguments
call 5      ;call BDOS
pop d       ;restore arguments
mvi c, 222  ;digital write
call 5      ;call BDOS
ret         ;exit to CP/M

Then use the ASM command to assemble it:

A>asm led
CP/M ASSEMBLER - VER 2.0
0111
000H USE FACTOR
END OF ASSEMBLY

RunCPM Version 3.7 (CP/M 2.2 60K)
This produces several files. LED.PRN is a text file containing your assembly language program along with the machine code it assembles to. Each line has 3 columns: address, machine code, and assembly language.
A>type led.prn

0100          org 100h
0100 0EDC     mvi c,220
0102 1608     mvi d,8
0104 1E01     mvi e, 1
0106 D5       push d
0107 CD0500   call 5
010A D1       pop d
010B 0EDE     mvi c, 222
010D CD0500   call 5
0110 C9       ret
There is also now a LED.HEX file. We can use the LOAD command/program to convert it into LED.COM which can be executed.
A> load led

FIRST ADDRESS 0100
LAST ADDRESS  0110
BYTES READ    0011
RECORDS WRITTEN 01
Now it can executed:
A>led
which will turn on the LED connected to pin D8.
So now we can read and write digital and analog I/O from Z80 assembly language code that's running on a Z80 emulated on the Grand Central. That seems pretty round-about.
While that's true, the point is to be able to play around with Z80 assembly language (and CP/M in this case) without having to find or build an actual Z80 system (although that can be its own kind of fun).
Closing Thoughts
One of the most lasting legacies of CP/M is its file system and command-line interface, with its 8-character filename followed by a 3-character file type (e.g., filename.txt), which became a standard that was carried into MS-DOS and later Windows. Its command-line interface, with commands like DIR to list files and REN to rename files, has echoes in the MS-DOS command prompt and persists in modern versions of Windows as the Command Prompt and PowerShell. CP/M was notable for being one of the first operating systems that was largely machine-independent, due to its separation between the operating system and the BIOS (Basic Input/Output System). This made it relatively easy to port CP/M to different computer systems and paved the way for the concept of a software ecosystem that is not tied to a specific set of hardware, a key principle in modern operating system design.
CP/M played a crucial role in the early days of personal computing; before the dominance of MS-DOS and Windows, CP/M was the de facto standard operating system for early microcomputers, fostering the personal computing revolution by making computers more approachable and useful for everyday tasks. When IBM was developing its first personal computer, CP/M was initially considered the operating system of choice, and although IBM ultimately went with MS-DOS (largely due to cost and timing), MS-DOS itself was heavily influenced by CP/M, with many command-line commands being similar and the overall architecture of MS-DOS bearing a strong resemblance to CP/M. This influence extended as MS-DOS evolved into Windows, making CP/M an indirect ancestor of one of the world’s most widely used operating systems. Even after its decline as a primary OS for general-purpose computers, CP/M found a second life in embedded systems and other specialized computing applications due to its lightweight, efficient design, setting the stage for the importance of compact, efficient operating systems in embedded and specialized computing devices, a category that has grown with the proliferation of IoT (Internet of Things) devices. In summary, CP/M stands as an iconic example of how early innovations in computing continue to have ripple effects that extend far into the future.
References
- https://www.cocoacrumbs.com/blog/2020-08-25-runcpm-on-linux-and-arduino-due/
- https://weblambdazero.blogspot.com/2016/07/cpm-on-stick_16.html
- https://hackaday.io/project/19560-z80-cpm-computer-using-an-arduino
- http://www.chstercius.cz/runcpm/
- https://hackaday.com/2014/12/30/z80-cpm-and-fat-file-formats/
- http://mrwrightteacher.net/retrochallenge2018/
- https://learn.adafruit.com/z80-cpm-emulator-for-the-samd51-grand-central
- https://forum.armbian.com/topic/8569-runcpm-on-armbian-cpm-weekend-fun/
- https://blog.hackster.io/z80-cp-m-emulator-runs-on-adafruits-new-grand-central-dev-board-6a28ad73dfbc
- https://www.instructables.com/Retro-CPM-Stand-Alone-Emulator/
- https://www.hackster.io/news/kian-ryan-s-tiny-2040-build-could-be-the-smallest-cp-m-microcomputer-in-history-5d8eeab29d29
- https://github.com/ptcryan/CPM_Due
- https://projecthub.arduino.cc/FoxyLab/arduino-nano-as-cpm-compatible-computer-b1300d
- https://dmitryelj.medium.com/the-1979-cp-m-os-how-does-it-look-like-today-be7caf13da6c