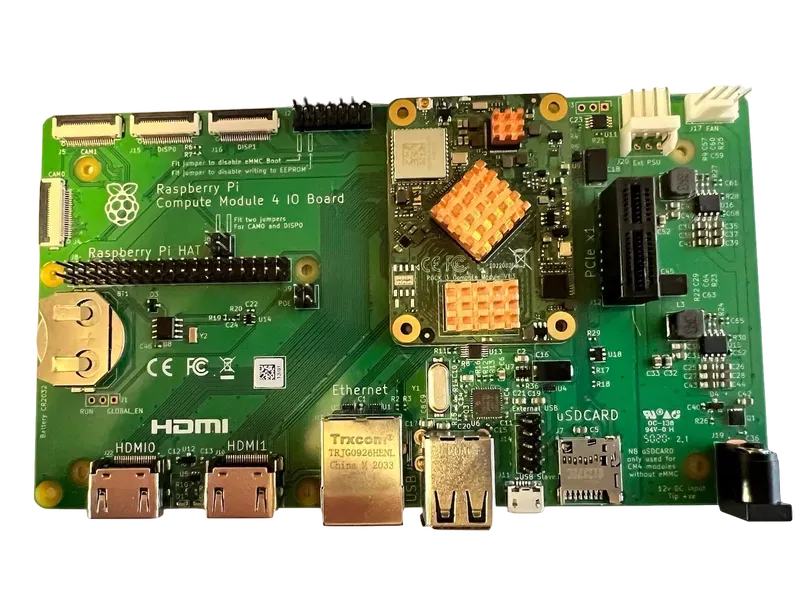
With my eventual goal of testing out network and router capabilities of four compute modules that are pin compatible with the Raspberry Pi CM4, I have been doing setup work. My last few postings (here, here and here) on getting Polycube, a drop-in replacement for iptables and a number of other utilities that uses eBPF instead of the usual netfilter-based mechanisms. The objective is to test out netfilterand ebpf routing on the four modules (giving me a collection of eight test sets).
I have Polycube compiled and appearing to function on the Raspberry Pi CM4, the Pine64 SOQuartz module, and the code compiled and runnable on the Radxa CM3. There is one problem with running Polycube on the CM3: the SYSCALL for eBPF was not compiled into the kernel. Even though the code successfully compiled to an executable binary, the necessary kernel hooks are not present. The solution: compile a new kernel and create a new disk image.
If you are a person who is interested in tiny computers of various flavors, you will have noticed that there are an abundance of different distributions out on the internet. An example, for the Pine64 Quartz64 model A, there are at least three different variant distributions - Plebian Linux, DietPI, and balbes150's Armbian. They all have one thing in common, they all use Debian packages and are in one sense or another, a derivative of Debian and the Debian ecosystem. If you have used Ubuntu, you have used a distribution that leverages Debian architecture and infrastructure.
The available distributions for Radxa CM3 also use Debian ecosystem components; everything from being able to utilize other arm64 packages, to using the build infrastructure for bundling up things into a handy disk image that can be burned/written to media.
Many single board computer distributions are what is called a "board support package", or BSP for short. A BSP includes low level boot programs (a first stage bootloader, prebuilt binaries and Arm Trustzone Firmware) a boot program (a second stage bootloader , like u-boot or Tianocore EFI), an operating system and the compatible drivers for that are specific to the board. The BSP is a unique bundling of software that is specific to a given board or family of boards. Often times, the Linux kernel that is included with a given BSP has been modified and new drivers have been added. The kernel is essentially a fork and no longer tracks the "main branch" of Linux kernel development and any upstream changes in the main branch maybe difficult or impossible to incorporate. The kernel is, therefore, a snapshot in time that all too often fades into obscurity because of lack of attention from the developers or a broader community (if a community exists).
Despite not having the following and community backing like that of Raspberry Pi, Radxa does have well maintained series of BSP distributions. Many do have their kernels pegged to a specific version within the Linux kernel repository, but much of the userland software is not usually tied to specific features found in specific versions -- unless the software is something like Polycube.
Radxa does a great job of providing build frameworks for both configuring and compiling a new kernel, as well as downloading packages and building a disk image. Let's get started.
The following information is based on this.
-
As a pregame note, I made a virtual machine using VirtualBox. Specifically, Debian 11 for build the new kernel in order to prevent any unnecessary contaminations of packages, dependencies or the like on my laptop. The building of the distribution image uses Docker and will not pose any issues.
-
Clone the Github repository rockchip-bsp and specifically the
stable-4.19-rock3branch. The pull in any submodules.git clone -b stable-4.19-rock3 https://github.com/radxa/rockchip-bsp.gitcd rockchip-bspgit submodule initgit submodule updateThe
stable-4.19-rock3branch has support for the following boards:- ROCK 3A
- ROCK 3B
- Radxa CM3 IO
- Radxa E23
- Radxa E25
- Radxa CM3 RASPCM4IO
Cloning the repository and checking out the
stable-4.19-rock3branch produces the following directories:- build: Some script files and configuration files for building u-boot, kernel and rootfs.
- kernel: kernel source code, current version is 4.19.193..
- rkbin: Prebuilt Rockchip binaries, include first stage loader and Arm TrustZone Firmware.
- rootfs: Bootstrap a Debian based rootfs, support architecture
armhfandarm64, supports Debian Jessie, Stretch and Buster. - u-boot: u-boot as the second stage bootloader
There are a few things to note. First, our kernel is version 4.19.193. Polycube requires at minimum v4.15. With v4.19, we are covered. Second, this repository/project contains scripts to bootstrap and build a disk image. We will not be using this functionality. The supported Debian distributions are too old. We have been using at least Debian bullseye for all of our Polycube testing.
-
Install a Linaro toolchain. This is used for compiling code on an x86/amd64 and producing arm64 binaries.
wget https://releases.linaro.org/components/toolchain/binaries/7.3-2018.05/aarch64-linux-gnu/gcc-linaro-7.3.1-2018.05-x86_64_aarch64-linux-gnu.tar.xzsudo tar xvf gcc-linaro-7.3.1-2018.05-x86_64_aarch64-linux-gnu.tar.xz -C /usr/local/Linaro has driven open source software development on Arm since 2010, providing the tools, Linux kernel quality and security needed for a solid foundation to innovate on. Linaro works with member companies and the open source community to maintain the Arm software ecosystem and enable new markets on Arm architecture.
-
In your user's
.bashrcfile, append the following line:export PATH="/usr/local/gcc-linaro-7.3.1-2018.05-x86_64_aarch64-linux-gnu/bin:$PATH"
Thensource.bashrcto update yourPATHvariable.source ~/.bashrcVerify that the Linaro GCC toolchain is visable from your
PATHwhich aarch64-linux-gnu-gcc/usr/local/gcc-linaro-7.3.1-2018.05-x86_64_aarch64-linux-gnu/bin/aarch64-linux-gnu-gcc -
Install a few packages:
sudo apt-get install gcc-aarch64-linux-gnu \device-tree-compiler libncurses5 libncurses5-dev \ build-essential libssl-dev mtools bc python dosfstools -
Build u-boot for Radxa CM3 and specifically for use with a Raspberry Pi CM4 carrier/io board.
./build/mk-uboot.sh rk3566-radxa-cm3-raspcm4ioThere should be files in
out/u-bootls -l out/u-boottotal 2132 -rw-rw-r-- 1 alex alex 299008 Feb 1 22:43 idbloader.img -rw-rw-r-- 1 alex alex 453056 Feb 1 22:43 rk356x_spl_loader_ddr1056_v1.10.111.bin -rw-rw-r-- 1 alex alex 1426944 Feb 1 22:43 u-boot.itb -
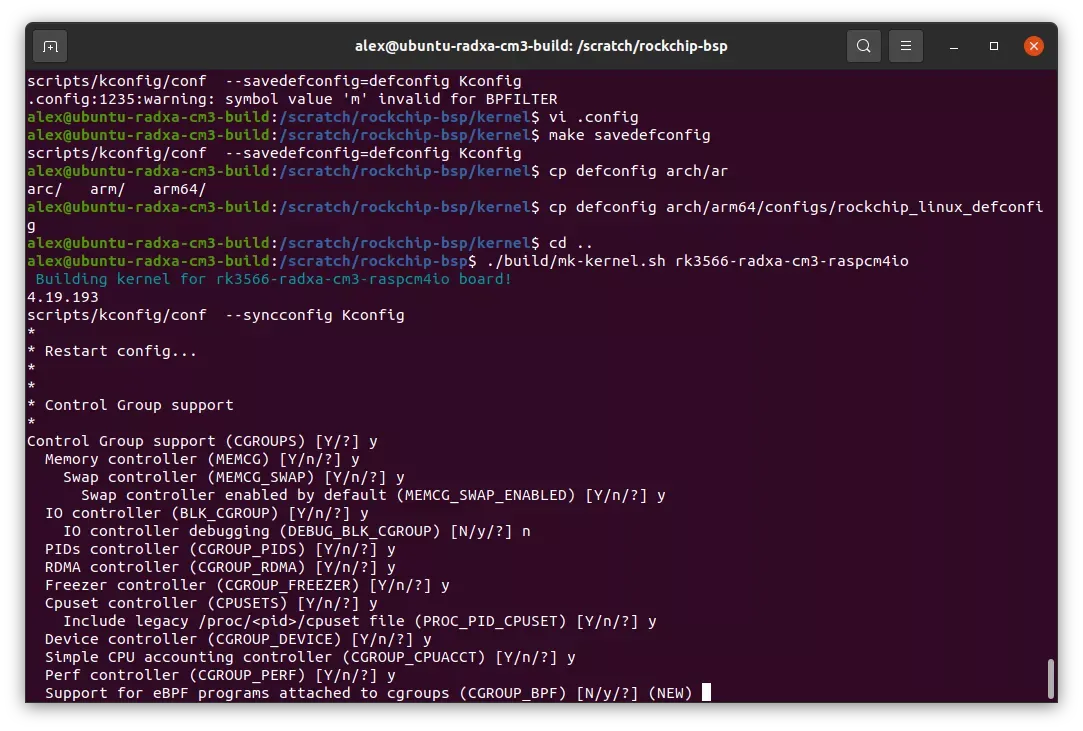
Configure a new kernel. If you have ever cloned the Linux source code repository or unarchived a tar-file of the source and then configured kernel and then compiled it, the following step will be familiar. The build process has been remarkably similar for better part of twenty-five years. I had not configured and compiled a kernel from source in a very long time; the kernel configuration process was remarkably familiar.
cd kernelexport ARCH=arm64export CROSS_COMPILE=aarch64-linux-gnu-make rockchip_linux_defconfigThere will be a file named
.config, you can either edit this by hand (if you have an idea of what you are doing and need to do) or you can use a handy menu-driven interface. Either way, for my specific needs of enabling eBPF, I simply opened.configin an editor, and searched for references toBPF.If you want to try the menu-driven method, execute the following:
make menuconfigSave your new configuration (run this whether you editted by hand or used
menuconfig)make savedefconfigcp defconfig arch/arm64/configs/rockchip_linux_defconfigcd ..
-
Build a kernel
This will kick off the compilation of the kernel; obviously, depending upon your build machine, it might take a while../build/mk-kernel.sh rk3566-radxa-cm3-raspcm4ioYou will likely be presented with some configuration questions:
Give that I am not entirely versed in things-kernel, I answered
yto all of the questions. Leave a comment below if you have some insight into the questions that are presented during the build process. -
Pack up your new kernel and associated headers into Debian package files (e.g.
.deb). The parameters forpack-kernel.share: 1) the name of the kernel configuration file (from step #7); 2)ebpfis a release value, it should be something useful.
This will compile the kernel, again, but this appears to be necessary because this steps does not configure the appropriate chip and board as in the previous step../build/pack-kernel.sh -d rockchip_linux_defconfig -r ebpf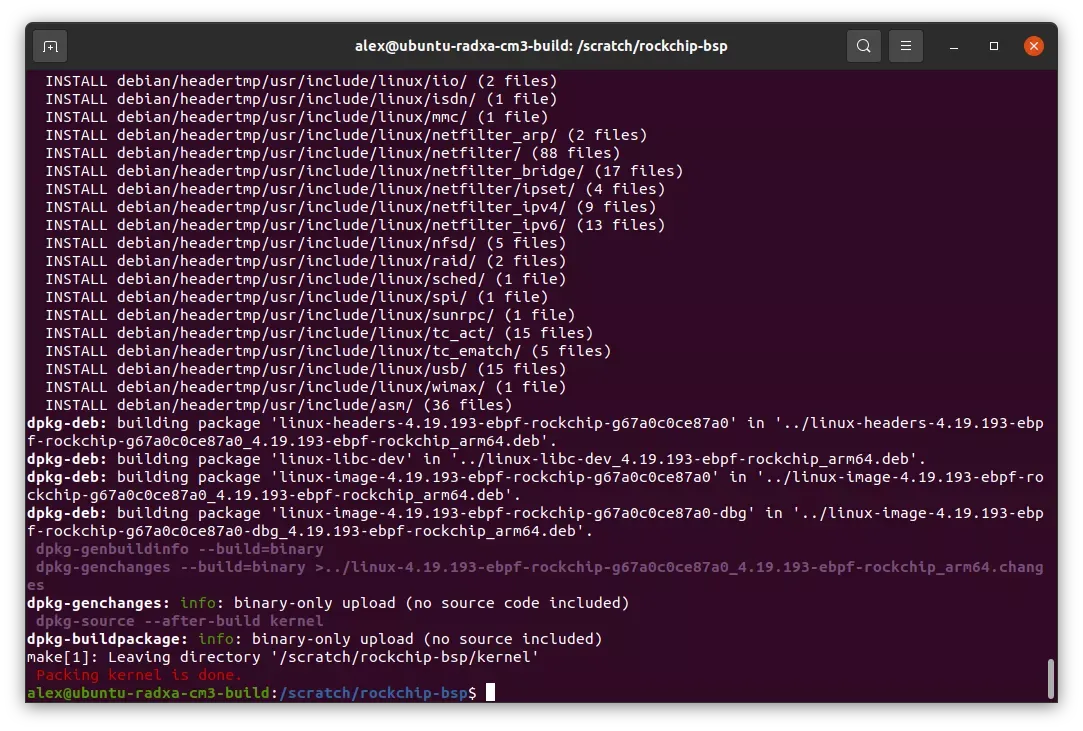
ls out/packages/linux-4.19.193-ebpf-rockchip-g67a0c0ce87a0_4.19.193-ebpf-rockchip_arm64.changes linux-headers-4.19.193-ebpf-rockchip-g67a0c0ce87a0_4.19.193-ebpf-rockchip_arm64.deb linux-image-4.19.193-ebpf-rockchip-g67a0c0ce87a0_4.19.193-ebpf-rockchip_arm64.deb linux-image-4.19.193-ebpf-rockchip-g67a0c0ce87a0-dbg_4.19.193-ebpf-rockchip_arm64.deb linux-libc-dev_4.19.193-ebpf-rockchip_arm64.debThese Debian packages will be needed when we build a Debian
bullseyedistribution. -
You will also need to copy
rk3566-radxa-cm3-rpi-cm4-io.dtbfromout/kerneldirectory; this device table is needed when writing a new disk image to the CM3.If you do want to assemble an older distribution (Debian buster or stretch), you can follow steps for Make rootfs image found here. I have a pre-built Debian buster with Desktop disk image available here
-
Change directories to place outside of the
rockchip-bspdirectory, and now, clone the Radxarbuildtoolgit clone https://github.com/radxa-repo/rbuild.gitYou will need
dockerand associated software packages. Installing these tools should be straightforward and there are dozens if not hundreds of howtos widely available to assist you. If you do not havedockercommand line tools installed and you looking for a quick guide, follow these instructions before proceding. -
Make a directory for your kernel packages; copy kernel packages
Make a directory for the kernel packages; I will be usingcd rbuilddockeroutside of the virtual machine that I used to build the kernel packages. You are free to use the VM for building thebullseyedisk image, I ran into issues and decided to use my laptop to directly usedocker. I usedscpto copy the kernel packages from the VM into a directory namedkernelthat is in therbuilddirectory containing the cloned repo. -
Run
rbuildto magically assemble a disk image for you; this will take a while, best to grab some coffee, or lunch, or just go home for the day. There is also a strong chance of having network timeouts while downloading necessary files. I ended up having at least five times where a package download failed and killed the whole build process. On a my Dell XPS Developer Edition laptop, in a VirtualBox VM, the process took over eight hours. It should be noted that even if there is a timeout, by specifying the-rparameter torbuild, this is caching the necessary Debian packages../rbuild -r -k kernel/linux-image-4.19.193-ebpf-rockchip-g67a0c0ce87a0_4.19.193-ebpf-rockchip_arm64.deb radxa-cm3-rpi-cm4-io cli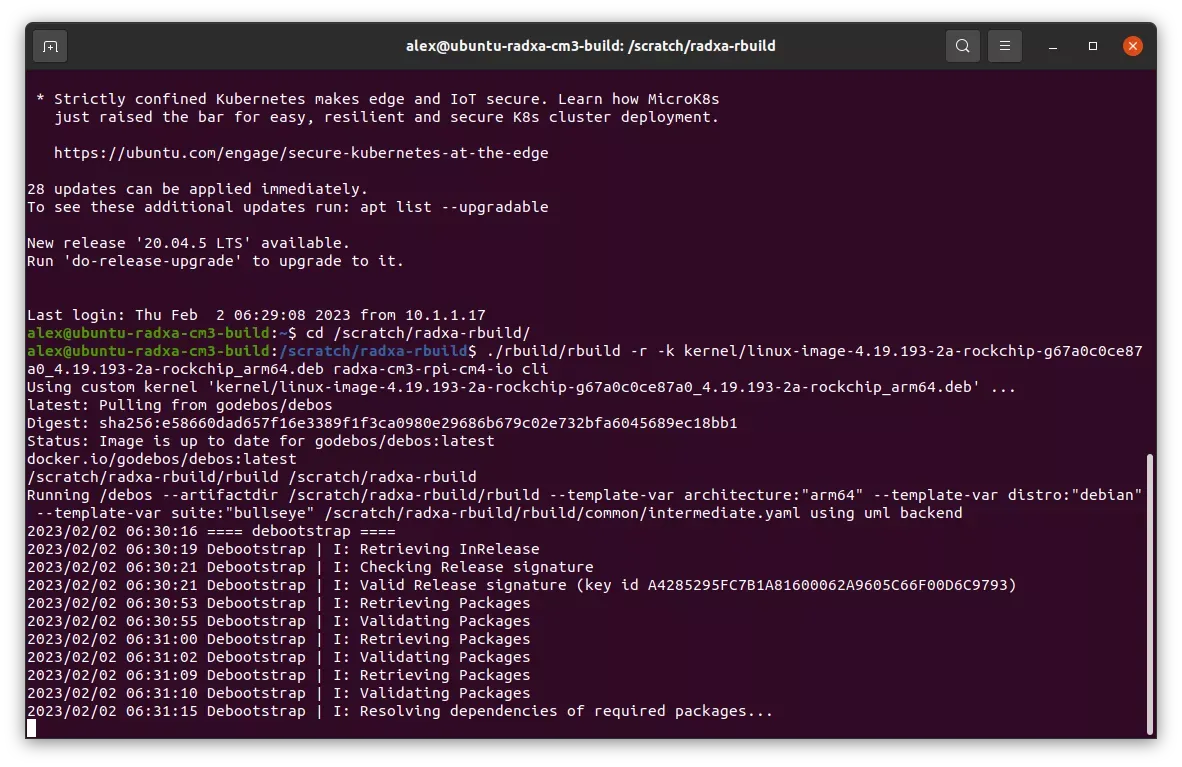
ls -ltotal 1434692 -rw-rw-r-- 1 alex alex 3322 Feb 1 22:17 action.yaml drwxrwxr-x 6 alex alex 4096 Feb 2 09:38 common drwxrwxr-x 2 alex alex 4096 Feb 1 22:17 configs drwxrwxr-x 2 alex alex 4096 Feb 1 22:38 kernel -rw-r--r-- 1 alex alex 6442450944 Feb 2 11:48 radxa-cm3-rpi-cm4-io_debian_bullseye_cli.img -rw-rw-r-- 1 alex alex 175 Feb 2 11:48 radxa-cm3-rpi-cm4-io_debian_bullseye_cli.img.sha512 -rwxrwxr-x 1 alex alex 18869 Feb 1 22:17 rbuild -rw-rw-r-- 1 alex alex 1542 Feb 1 22:17 README.md -
And there we have it.
radxa-cm3-rpi-cm4-io_debian_bullseye_cli.imgis your new disk image, complete with a custom compiled kernel with eBPF enabled. We can compress the disk image withxzto make it more manageable.xz -z -v radxa-cm3-rpi-cm4-io_debian_bullseye_cli.img radxa-cm3-rpi-cm4-io_debian_bullseye_cli.img (1/1) 3.0 % 5,938.2 KiB / 185.7 MiB = 0.031 10 MiB/s 0:18 9 min 50 s -
You can download the kernel and disk image that was built during the writing of this post: https://cdn.tinycomputers.io/radxa-rock3/debian-buster-linux-4.19.193-2a-eBPF-rockchip-rk3566-radxa-cm3-rpicm4io.img.xz
The Device Table file built during the writing of this post: https://cdn.tinycomputers.io/radxa-rock3/linux-image-4.19.193-ebpf-rockchip-g67a0c0ce87a0_4.19.193-ebpf-rockchip_arm64.dtb
-
Instructions on writing the disk image to eMMC on the Radxa CM3, you can follow the instructions on my previous post, Raspberry Pi CM4 and Pin Compatible Modules
More Information on Radxa's build scripts, rbuild documentation and its github repo