A Mac, Two Disk Images, and an SSH Prompt: OpenBSD 7.9 on the Raspberry Pi 4B
I wanted an OpenBSD machine I could plug into the network and immediately start using. Put the card in, connect Ethernet, apply power, find its address, SSH in. An ordinary account with my key, doas when I needed root, and enough room on the card that installing software would not immediately become another storage project. A modest list, which is how these things usually begin.
The machine now exists. A Raspberry Pi 4 Model B Rev 1.5, four Cortex-A72 cores and 4 GB of RAM, running OpenBSD 7.9 from microSD. It answers to rpi4b, negotiated gigabit Ethernet, and has separate /usr and /home filesystems with about 28 GiB each. The installation happened inside a virtual machine on my Apple Silicon Mac. By the time the card reached the Pi, the operating system was installed, patched, configured, and waiting for hardware to inhabit.
Make your own card: Download the generic OpenBSD 7.9 image (525 MiB), with setup instructions, SHA-256 checksums, and firmware licenses and corresponding source. This unofficial build accepts your SSH public key before boot. Its VM tests passed; a physical Pi boot test of the generic version is still pending.
The handoff from VM to hardware is the interesting part. A VM can tell you quite a lot about an operating system. It has considerably less to say about whether a Raspberry Pi will find the bootloader you put on a card.
OpenBSD already supports the Pi 4 through its arm64 port. The official installation media includes the Raspberry Pi firmware, so the starting point was conveniently unexotic: install79.img from the OpenBSD 7.9 arm64 release, its signed checksum manifest, and the release public key. The arm64 platform page documents the support and the firmware requirements.
I wanted the installation completed before deployment. An installer image gets you to the place where you can install an operating system; the image I wanted would get me to an SSH prompt. That meant running the installer somewhere, making the configuration decisions there, and preserving its finished disk as the thing I would eventually write to microSD.
The Mac made a good workshop. QEMU ran a generic ARM64 virt machine using Apple's Hypervisor Framework acceleration, with four virtual CPUs, 2 GB of RAM, EDK2 UEFI firmware, and virtio disk and network devices. SSH was forwarded to a port on the Mac's loopback interface. I could inspect the console and connect to the guest without giving every intermediate version of the build a presence on the LAN.
Before installation, we verified the release material. The helper checked the Ed25519 signature on the manifest and the SHA-256 digest of the installer. It also compared the release public keys obtained from the official download location and OpenBSD's source repository. The original downloads and verification results stayed in the project directory with the scripts.
There would eventually be several images with very similar names. Keeping a record of which bytes had actually been checked seemed like a better plan than trusting my future ability to remember what “final” meant.
The installer set the hostname to rpi4b, created my alex account, enabled SSH, and selected America/Chicago. We installed the release sets and retained the answer file and customization scripts. OpenBSD then booted as a normal installed guest. At that point, the account, services, and filesystems were all available for testing, and the Pi-specific boot work was still ahead.
QEMU was providing the guest with UEFI firmware. The Pi would need to reach OpenBSD through its own boot chain, using files on the card. Installing under the generic virtual machine did not automatically arrange all of those files for the physical board.
The customization script mounted the target's FAT boot partition and populated it with the Pi firmware, device trees, overlays, and U-Boot supplied by the official installer. It checked for the Pi 4's bcm2711-rpi-4-b.dtb and the EFI loader at efi/boot/bootaa64.efi. The boot configuration fit in four lines:
arm_64bit=1
enable_uart=1
dtoverlay=disable-bt
kernel=u-boot.bin
We compared the resulting configuration, start4.elf, fixup4.dat, Pi 4 device tree, U-Boot, Bluetooth-disabling overlay, and EFI loader against the signed installer. All matched. There was a known source for the firmware on this card, and a check that the files had survived the assembly process intact.
The guest could demonstrate that OpenBSD started and accepted a login. The firmware comparison established that the Pi's boot files matched their source. The eventual hardware boot would connect those observations.
The network configuration had a similar wrinkle. QEMU's network card appeared as vio0. The Pi's onboard Ethernet appeared as bse0, through OpenBSD's Broadcom GENET driver. A perfectly functional DHCP configuration for a virtual network card would be of limited assistance to a physical interface with a different name.
So the image kept its vio0 configuration for future VM testing and gained an /etc/hostname.bse0 containing:
inet autoconf
inet6 autoconf
IPv4 DHCP and IPv6 autoconfiguration. That was the entire wired-network setup. No static address embedded in an image that might eventually land on another network, and no Wi-Fi credentials to get right before the first login. I would find rpi4b in the router's lease table. Automatic .local discovery was not configured, so the lease table was part of the intended procedure.
For SSH, I used the same arrangement I wanted to live with afterward. My public key went into /home/alex/.ssh/authorized_keys; the private key stayed on the Mac. The server started automatically, with public-key authentication enabled and password authentication, keyboard-interactive authentication, and direct root login disabled.
There is consequently no default password for this image. Someone repeating the build needs to supply their own public key. These are the access choices for my installation, rather than a claim about what every OpenBSD installation does by default.
Root access was one line in /etc/doas.conf:
permit nopass alex as root
I like how little explanation that line needs. alex may become root, and another password prompt is not involved. The doas manual describes how to restrict rules to particular commands or arguments, but this account is the machine's administrator. Its rule deliberately permits all commands as root. Anyone holding the corresponding login key has that authority.
The test was equally compact:
doas -n id -u
It printed 0. The -n makes it noninteractive, so a successful result establishes that the permission actually works without a prompt. We also checked the running SSH daemon and its effective configuration. A line in a file is an intention; being able to log in and run the command is the behavior I was trying to buy with it.
Then there was the card, and the apparently small request to use the rest of it.
The portable image was 14 GiB: 15,032,385,536 bytes. Its layout included root, swap, separate /usr and /home filesystems, and a firmware partition. It also retained about 7.1 GiB of unallocated space inside the image. Writing it onto a larger card would reproduce that layout faithfully, including its unused space.
There was no automatic first-boot expansion in this build. The image had exactly the filesystem sizes we gave it. A larger card would not persuade OpenBSD to reconsider them on its own.
I wanted the extra capacity divided between /usr and /home, where installed software and my own work would have room to accumulate. Root, swap, and the boot area could stay as they were. So we made a second image sized to the actual card: 63,864,569,856 bytes.
That number matters more than the “64 GB” on the packaging. Cards sold under the same capacity label can differ in their exact size. An image built to the last usable part of one card needs another card at least that large. The portable version is the smaller starting point; the expanded version is the one prepared for this deployment.
Here is what df -h reported for the filesystems, with swap and the boot partition included for context:
| Filesystem or area | Portable image | Expanded image |
|---|---|---|
/ |
1.3 GiB | 1.3 GiB |
/usr |
2.9 GiB | 28.3 GiB |
/home |
1.9 GiB | 27.4 GiB |
| Swap | 256 MiB | 256 MiB |
| Firmware partition | 260 MiB | 260 MiB |
The added space was divided equally. The final totals differ because /usr started larger. Filesystem sizes are also slightly smaller than their containing partitions, which explains why multiplying a displayed number back into sectors will not reproduce the disklabel.
The complication was physical ordering. /home sat after /usr. Giving /usr more contiguous space required relocating /home first. The friendly phrase “expand both partitions” had turned into a sequence where the order of operations mattered quite a bit.
We did this offline, in an OpenBSD installer VM, with the original image attached read-only alongside the larger target image and installer. The scripts checked the disk capacity, partition offsets, filesystem types, and disk identifier against the expected layout before proceeding. They were intentionally specific to these images. I would rather have a resize script decline a disk it does not recognize than improvise with its contents.
First came extending the OpenBSD area in the outer partition table and enlarging the disklabel boundary. Then /home was recreated at its final location, populated from the read-only source, and checked for matching contents and ownership. Only after that copy was verified could /usr grow into the space that had become available.
For /usr, the script checked the existing filesystem, enlarged its partition, ran a growfs dry run, performed the growth, and checked the filesystem again. OpenBSD's growfs documentation calls for an unmounted filesystem and a filesystem check afterward. Booting the installer gave us an environment where the target's /usr was simply another unmounted disk partition.
The expanded filesystems passed their checks. The disk identifier, root, swap, and firmware area were preserved. A normal boot of the expanded image then confirmed that /usr and /home mounted where they belonged, at their new sizes.
Root still has about 1.3 GiB, and /var lives there in this layout. That is a choice with consequences if the machine later becomes a collector of logs or service data. For the current installation it leaves ample room, but I have not allocated 28 GiB to every directory just by putting a larger card underneath them.
Before packaging, we applied the available updates. The September 7, 2026 build had patches 001 through 014 installed, with no further patches reported by the update check. That statement has a date attached for a reason; anyone deploying later should check the OpenBSD 7.9 errata and run the update tools again.
We also waited for kernel relinking to finish. Then the image needed to forget the parts of its identity that belonged to the VM: its generated SSH host keys and temporary DHCP lease. The resolver configuration was reset, and the Pi would generate fresh host keys at its own boot. A first-boot fw_update would detect firmware needs in the physical environment.
My authorized public key stayed. That key says who may administer the machine. The host keys say which machine has answered the connection. Cloning the first is the point of this personalized image; generating the second during deployment gives the running system its own SSH identity.
Both variants booted independently in QEMU. SSH login worked, sshd was running, doas returned root, and the effective SSH settings and filesystem mounts matched the intended configuration. Each guest shut down cleanly before packaging. We compressed the raw images with gzip and verified that decompression reproduced the originals, along with checks of the partition table and boot partition.
The compressed files were about 644 MiB and 738 MiB. Their expanded disk sizes were considerably larger, but empty space is cooperative material for a compressor. A SHA-256 manifest recorded the packaged artifacts.
Writing the expanded image from macOS used the usual whole-device procedure:
diskutil list external physical
diskutil info /dev/diskN
diskutil unmountDisk /dev/diskN
sudo dd if=images/openbsd-7.9-rpi4b-64gb.img of=/dev/rdiskN bs=4m
sync
diskutil eject /dev/diskN
N must be the verified card identifier, and the target must be large enough. That command replaces the whole device's contents. It takes the raw .img; a gzip file needs decompression first. On macOS, Control-T asks dd for a progress report, which is useful when the terminal has spent several minutes giving every appearance of having lost interest.
The entire 63,864,569,856-byte write completed. I stopped the subsequent full-card readback before it finished, and the card was safely ejected. The records therefore say exactly that: complete image-package verification, complete card write, incomplete card readback verification. The physical boot that followed supplied different evidence; it did not retroactively checksum the unread part of the card.
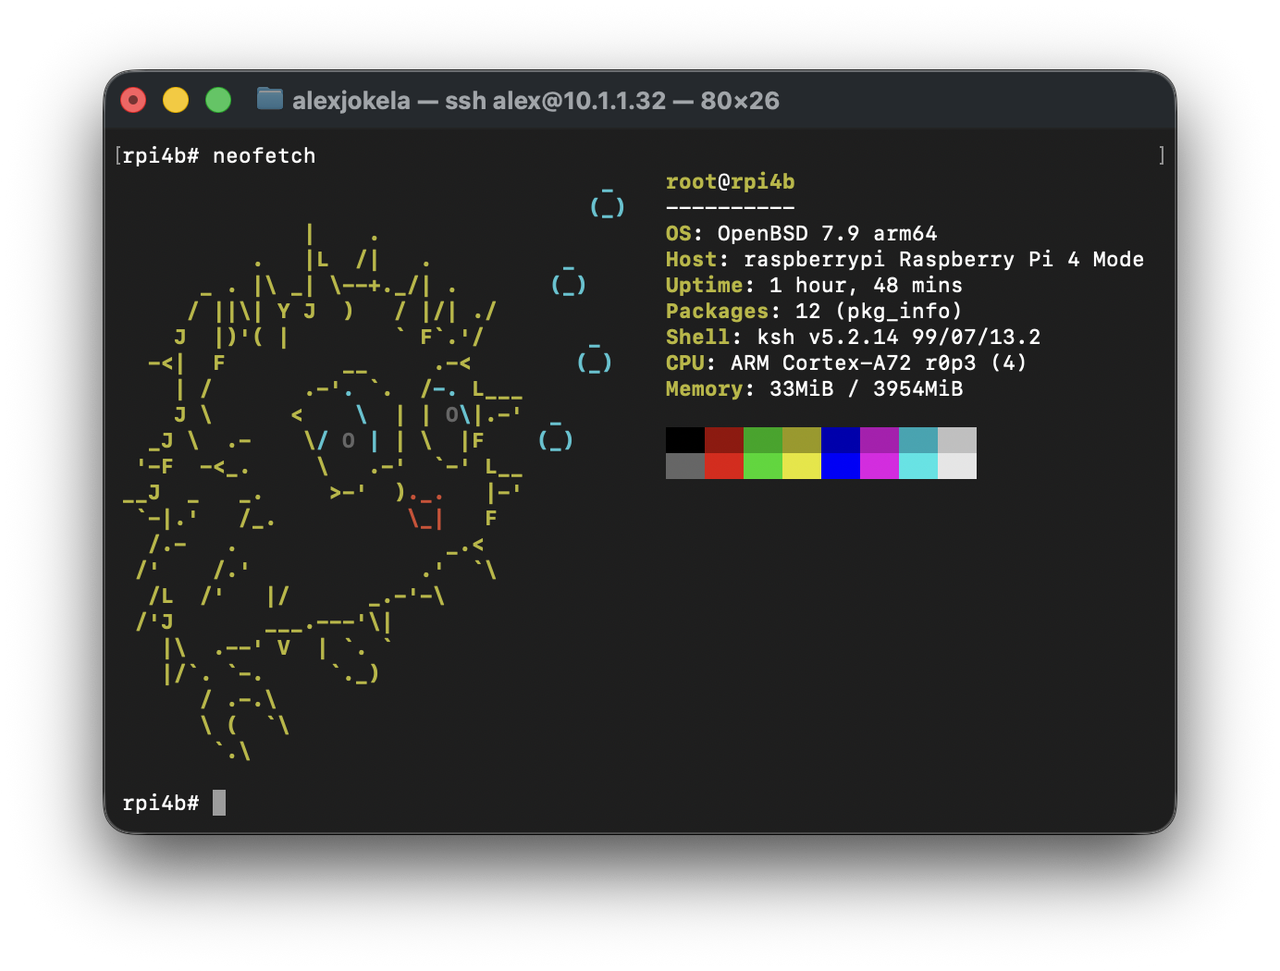
With the card in the Pi and Ethernet connected, the machine booted. The router assigned 10.1.1.32 on my 10.1.1.0/24 network, under the hostname rpi4b. I connected with:
ssh -i ~/.ssh/id_ed25519 alex@10.1.1.32
OpenBSD 7.9, arm64. The boot log identified the Pi 4 Model B Rev 1.5 and all four Cortex-A72 cores. rcctl check sshd returned a running service. doas -n id -u printed 0. /usr mounted at 28.3 GiB and /home at 27.4 GiB.
bse0 reported 1000baseT full-duplex, with the link active. That is a negotiated link speed, not a throughput benchmark. The session established that wired networking and SSH worked on the real board. The expanded image received this physical test; the portable variant had its independent VM validation but was not separately booted on the Pi.
That was the handoff completed: the boot files found the operating system, the operating system found its hardware, and the configuration I had tested on the Mac became the configuration of a machine on the network.
A download for the next card
An image containing my login key had a rather limited audience. For the downloadable version, we created fresh filesystems, copied the system into them, and removed my account, keys, history, and inherited machine identities. Fresh filesystems also keep deleted personal files out of the free space. Each deployment generates its own SSH host keys.
The generic archive is about 525 MiB, expanding to 63,864,569,856 bytes. Check your card's actual capacity; a “64 GB” label is not enough. This version keeps separate /usr and /home filesystems, reporting about 28.4 GiB and 27.4 GiB after fresh formatting. There is no automatic expansion on larger cards.
Download the image and SHA256 from the links above into one directory. On macOS, verify the download before decompressing it:
shasum -a 256 --ignore-missing -c SHA256
gzip -dc openbsd-7.9-rpi4b-generic.img.gz > openbsd-7.9-rpi4b-generic.img
Continue only if verification reports the image as OK. Linux uses sha256sum --ignore-missing -c SHA256. The manifest also covers the companion files; missing companions are skipped. Allow roughly 64 GB of free space for decompression.
Flash the resulting .img using the whole-card procedure above, substituting the generic filename. Reinsert the card afterward and find its small FAT boot volume. Copy your public key into that volume's root directory, replacing BOOT_VOLUME with its actual mounted name:
cp ~/.ssh/id_ed25519.pub /Volumes/BOOT_VOLUME/authorized_keys
The private key stays on your computer. Optionally add a plain-text setup.conf beside authorized_keys:
username=openbsd
hostname=openbsd-rpi4b
Those are the defaults; the timezone is UTC. Safely eject the card, boot the Pi with Ethernet connected, and find its address in the DHCP leases. Then:
ssh -i ~/.ssh/id_ed25519 openbsd@PI_ADDRESS
doas -s
There is no default password. SSH stays disabled until a valid public key is supplied, then permits key login for the owner. Direct root SSH login is disabled; doas grants root without a password. Missing or malformed setup input can be corrected on the FAT partition and retried at the next boot.
Disposable VM copies passed owner setup, SSH, doas, reboot persistence, and installation of a signed package through pkg_add. Unrelated keys and root logins were rejected. The validation record and first-boot helper source are included. The generic image retains the boot firmware from my working card, but it still needs its own physical Pi test. The successful hardware session above belongs to the personalized build.
For now, rpi4b has an address and an SSH prompt. I can install software, copy a project over, or become root without reaching for a monitor. The card arrived with the installation work already behind it, which was the whole ambition when this was still a modest list.